Showing posts with label Creations. Show all posts

Thursday, October 24, 2013

Pink...Pink...I Just Love Pink!

Sometimes I see fabric at the store and it's as though the fabric has it's own gravitational force.........the luscious colors just pull me in.  And so it was with the fabric I used for another bag I made for my crafts.....this one was for my hand stitching. 
I just love the roses set on the soft blue background, and who could resist the pink and white polka dot?   It's just the perfect shade of pink....not too soft, not too harsh.....aaaaah, just right!
Just like the knitting bag, this bag began with the embroidery from Embroidery Library.     I stitched lime green (my other favorite color) ric rac around the embroidery which was then lined to create a pocket.   The pocket was then hand stitched on three sides to the front of the bag using heavy light pink cotton thread.   And I added two lime buttons to the handles to tie all the colors together.   Love, love, love the way this turned out.
Of course I put some pockets on each of the long sides inside the bag which hold patterns, scissors and floss.  As you can see I am currently using this bag to hold redwork embroidery for a quilt I am making for Christmas.   And just like the small bag I made for knitting socks, this bag is always stocked with everything I need to work on my project.   That way I can just pick up the bag at any time and walk out the door with some handwork to keep me busy while waiting at appointments.
If you have ever done any hand stitching you know that the first thing you need to keep organized are your needles for different projects.  A needle case is the easiest way to keep all your needles in one place and at the ready for a new project.   I had this wonderful lime fabric with script across it just begging to be used.   And I found a small crochet flower and smaller three dimensional rose button in one of my drawers of "goodies" and used those to complete the front of the needle case.
When you untie the pink ribbons and open up the needle case there are two pockets on the left which are large enough to hold quite a supply of packaged needles for different stitchery projects.   On the right is a thick flap of felt that is only attached at the top with the pink and cream ribbon making it easy for needles in use to be "on hold" there, ready and waiting for more thread.
Hand work bag
  
Knitted socks bag
Large knitted projects bag

I'm thrilled with all three of my new craft bags...one for knitting socks, one for large knitting projects, and one for hand stitching.   Color is what always draws me to fabric....and paint.....and clothes....and department store displays....and cars..........ooops, sorry, I got carried away.   As I was saying, color always draws me to fabric, but when I sew something it needs to be very functional in order for me to be happy with the end result.   And I'm very happy with how all of these bags have turned out.  I expect to get many years of use out of them, and they make me smile whenever I pick them up as I head out the door.                        

Why not make some bags for your own projects?
Debbie                                                                                                                                                                      

Wednesday, October 23, 2013

Kaffe Fassett Rocks!

If you read my other blog, I promised to show the pics of the large version of a knitting bag I recently made.   When we go on trips with our RV, I usually end up knitting during a large portion of the drive while I'm sitting in the passenger seat.  After struggling with store plastic shopping bags to hold my projects I finally gave in and realized I would enjoy the knitting process a whole lot more if I didn't have to fight to keep my knitting organized.  
And this is what I came up with.   The bag is made using Kaffe Fassett fabrics, gotta love those bright, cheerful prints of his!   The bag measures 18" high and 14" wide and 6" deep.  
The embroidery was downloaded from Embroidery Library and stitched out on my Viking embroidery machine.   I felt like the embroidered focal point of the bag needed something three dimensional, so I added the lime, pink and orange ringed buttons on the left side and pinned a lime colored silk rose above the embroidery.   Aaaaah, now that's better.
I wanted to be sure the bag lasted a long time and so I added 8 sturdy metal purse feet to the bottom to protect it from getting worn.
There are pockets inside to hold scissors and other knitting paraphernalia.  And don't you just love the home-dec lime fringe?   See the smaller bag peeking out of the top?    There's more about that bag below.....keep reading.
 Luckily, I had these curved bamboo handles in my stash that were just the right size for the bag and were sturdy enough to hold the knitting bag and all its contents.   I took three different colors of heavy cotton and simply straight stitched under the handle to prevent it from slipping and to add some decorative panache.  Hand work is still one of the simple joys in my life.    Sigh.....

Here is one row of orange stitching completed and the lavender thread is next.   You can also see the finished embroidery piece that became the focal point of the bag.
And here is the completed stitching.  It works great to prevent the handles from slipping and sliding in their fabric casing which was used to attach the handles to the bag.
Also, I made this smaller bag that is just large enough to hold my sock pattern, double pointed needles and a skein of yarn.   This bag is for socks that are in progress.   I always have a skein of yarn in the bag and then when I have a doctor's appt. or need to kill some time, I just grab the bag and I have a ready-made project with me.....something to pass the time while waiting for appointments.  This bag can also just slip inside the larger one and is made from a companion print and has the lime handle to co-ordinate with the lime accents on the larger bag.   Too.  Much.  Fun!

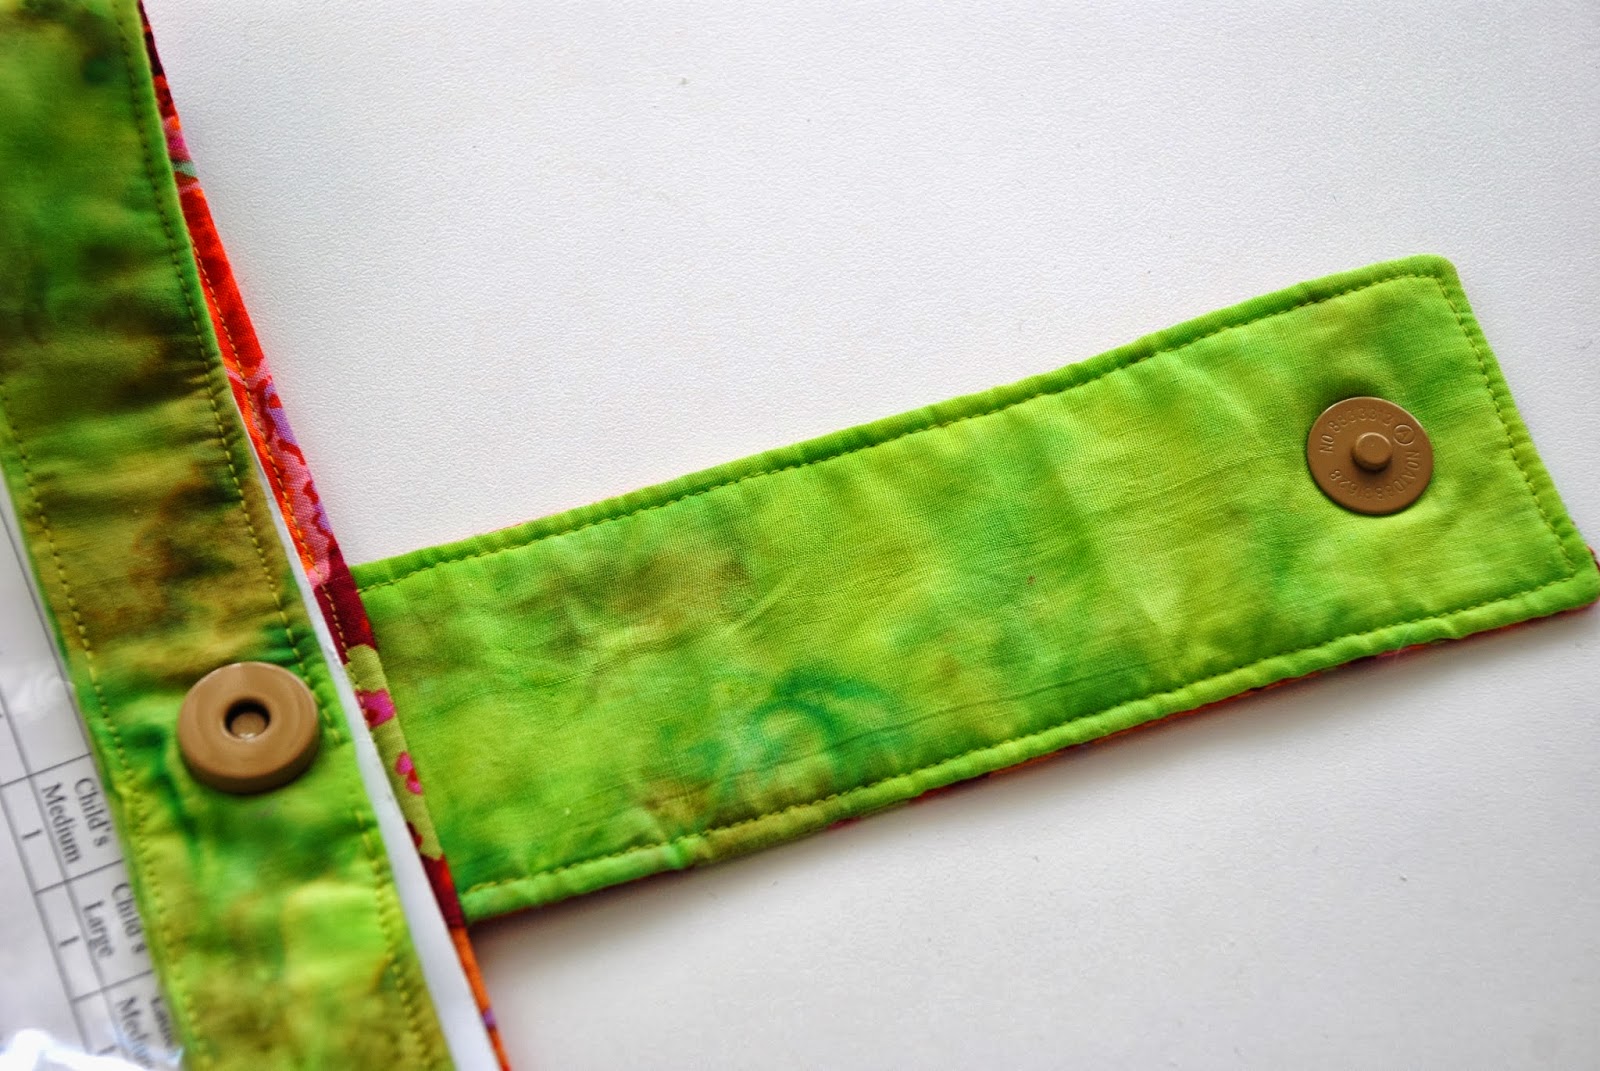
To close the bag, I used one of my favorite magnets on the lime tab top which also becomes the handle for the bag.

All in all, it was a real treat for me to sew these bags and create something that was both fun and useful for me, myself and I.   Since I spend the majority of my time in the studio working on projects for clients, it was a real treat to let my imagination run wild and create this bag "on the fly".   I've used the large bag for 2 knitting projects so far and it functions great.   But most of all it makes me smile every time I look at it.  And the smaller bag gets popped into my purse several times a week so I can keep making more socks.

One more bag to show you tomorrow,
Debbie

Monday, October 21, 2013

Star Wars Pillow

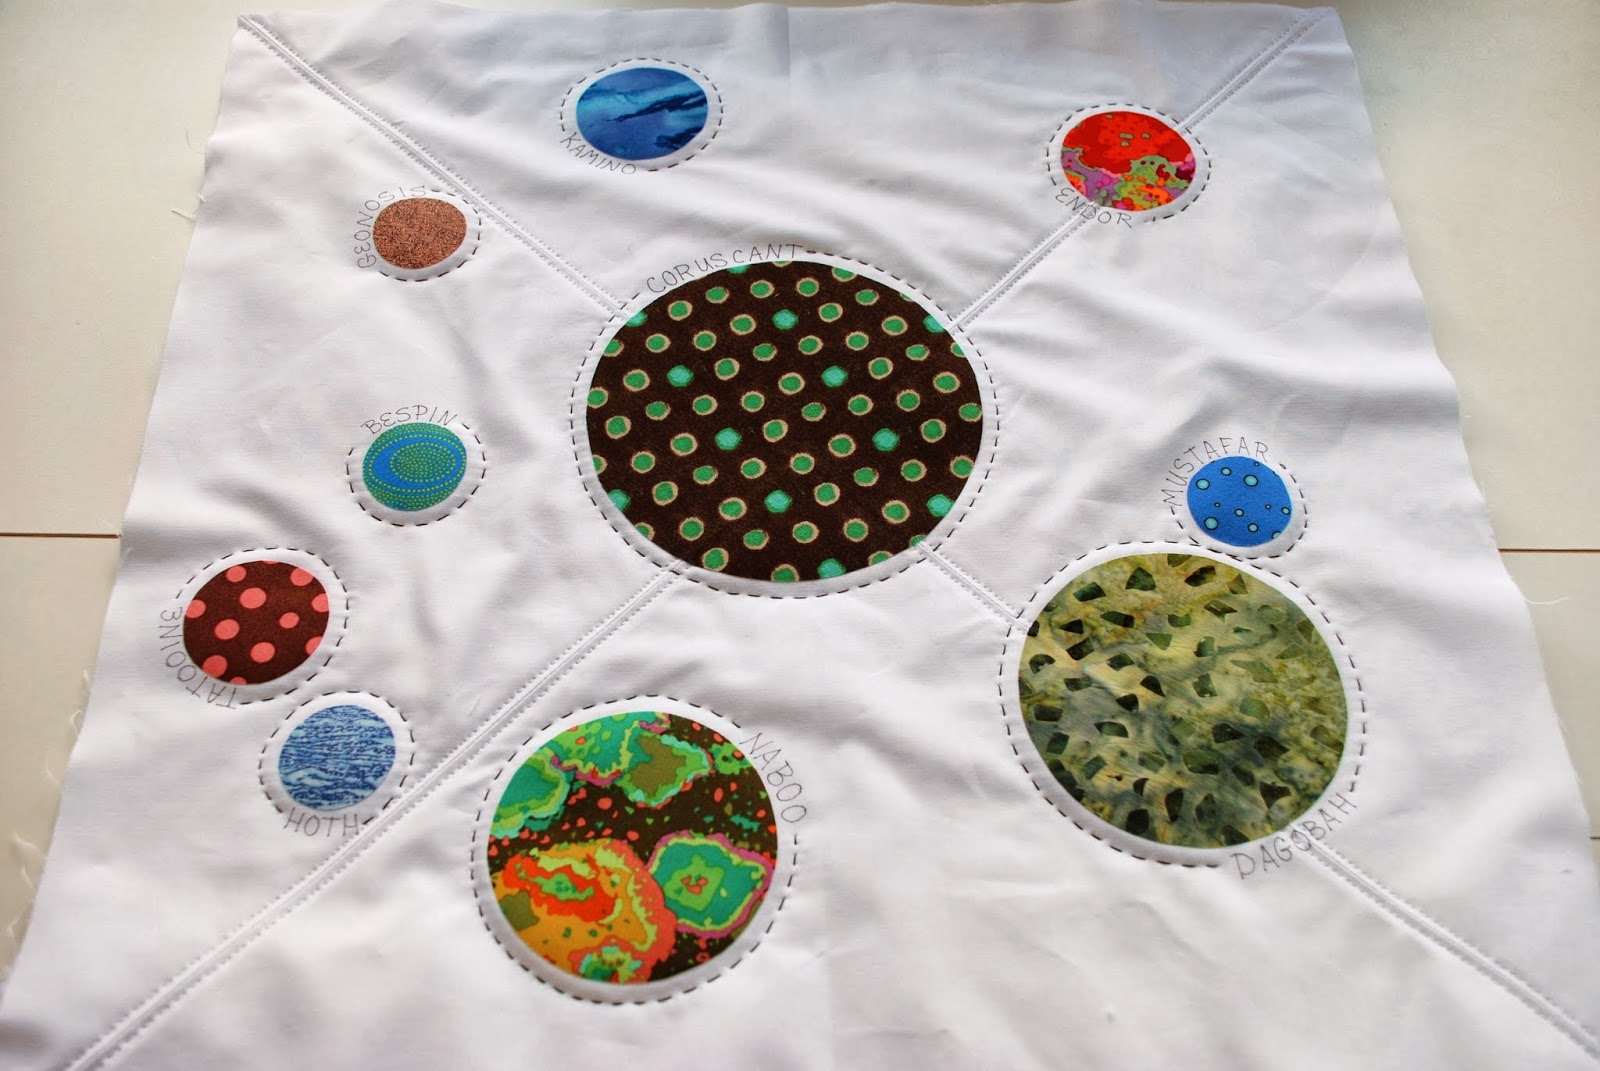
I wish I could tell you I was really clever and that I created this pillow out of my imagination, but, alas, that's not what happened.   When I was on Pinterest I saw this really cool pillow and my oldest grandson came to mind immediately as he loves anything that has to do with Star Wars.    When he was visiting I asked him to name the planets from the movie that he liked the most and he named some extras that weren't on the original pillow I saw on Pinterest so I included them for him.  

So I went thru my fabric stash and came up with wacky colors that I thought might be part of a Star Wars world and used Steam a Seam Lt. II on the back of the circles and adhered them to a white fabric base.  
And of course I used the Sashiko machine to stitch around the planets after writing the names of the planets in permanent ink. 
 
I especially like the fabric for Naboo as it looks to me as if it's a molten planet with shifting continents.   Hey, use your imagination!   It kinda looks like that, doesn't it?
This was a fun afternoon project and Jackson was really excited about getting a pillow to match his "brown" bedroom.    More decorating to come.......

May the Force Be With You,
Debbie

Monday, October 7, 2013

Lovely Lavender for a Friend

Late last spring, my friend Barb had to have some surgery, and she told me that she would be laid up for quite a while afterwards.   It's hard to support a friend during something like that when you live a day's drive away from them.   You know what I mean, don't you?   You want to make them soup, and maybe run their vacuum for them, bring them flowers and a card, or just sit with them to keep them company as they recover.

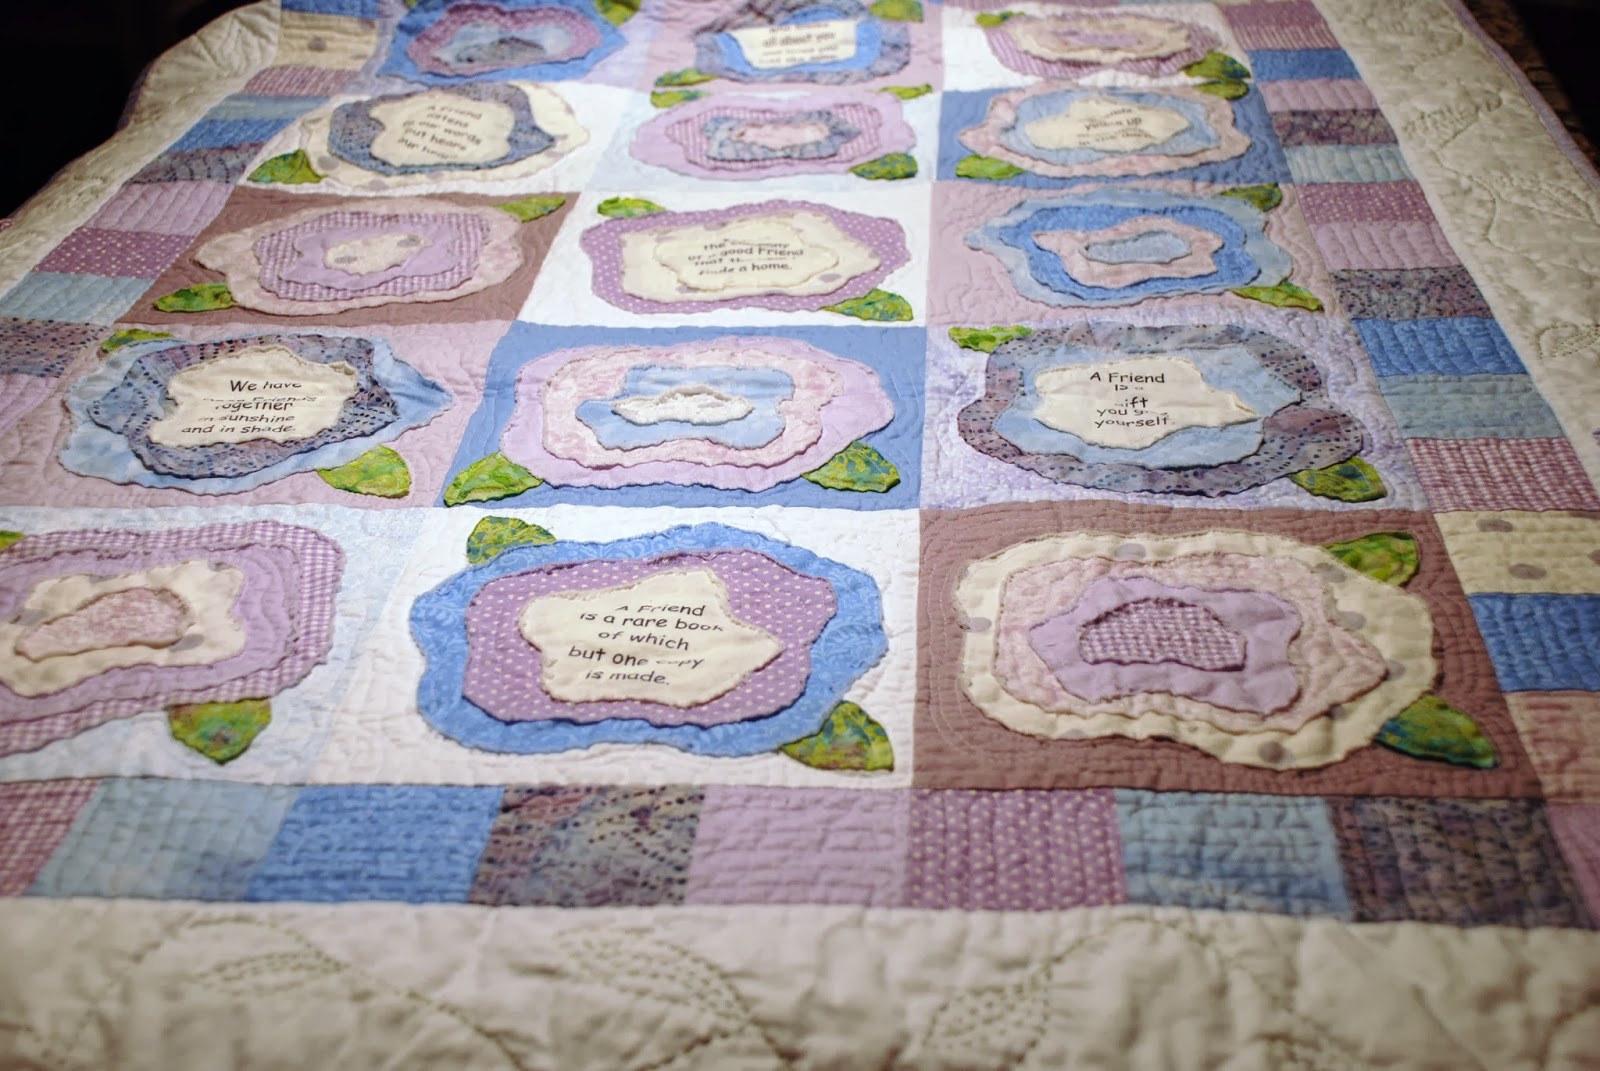
Well, after a lot of thought, I decided to make a quilt for her to use as she lay on her bed or the couch recovering.    At least I would be there in spirit with her, trying to give her some comfort and aid.   Barb loves the color lavender a lot(she even has a lavender bedroom), and I decided to add heather, cornflower blue and all shades of light purple to her quilt.   So, now, here's the quilt I made for her.

The design of the quilt began with a pattern from Heather French (can you believe it?   More heather??? for my purple quilt?)  The pattern is called "French Roses" and uses soft edge applique as the technique for making the roses.   You can get the pattern for the rose blocks at 1-702-236-8666 or email her @ french_roses06@yahoo.com.


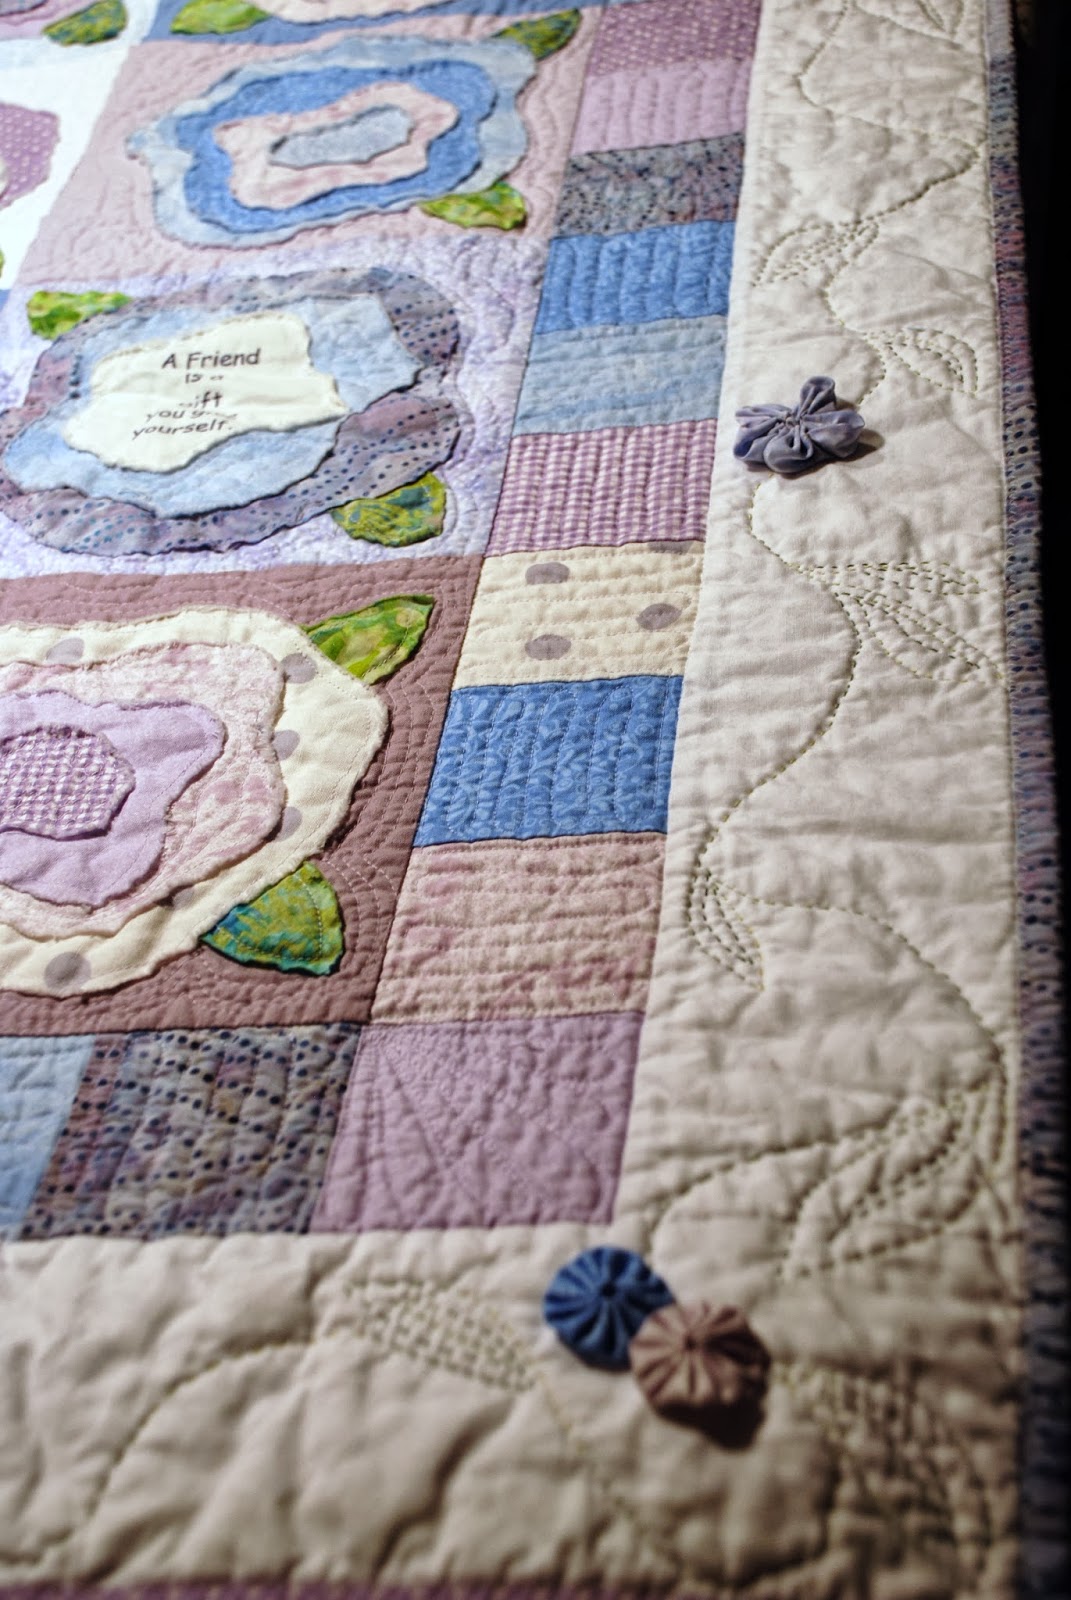
Each block has a multi-layered rose and a couple of leaves.  The whole quilt is very free form as the roses are 3-4 layers of fabric, with raw edges so that when you wash the quilt the edges ravel and fray and get really "rustic" looking.   Sorry the photo above turned out a little blurry.   Looks like I need to polish my picture taking skills.
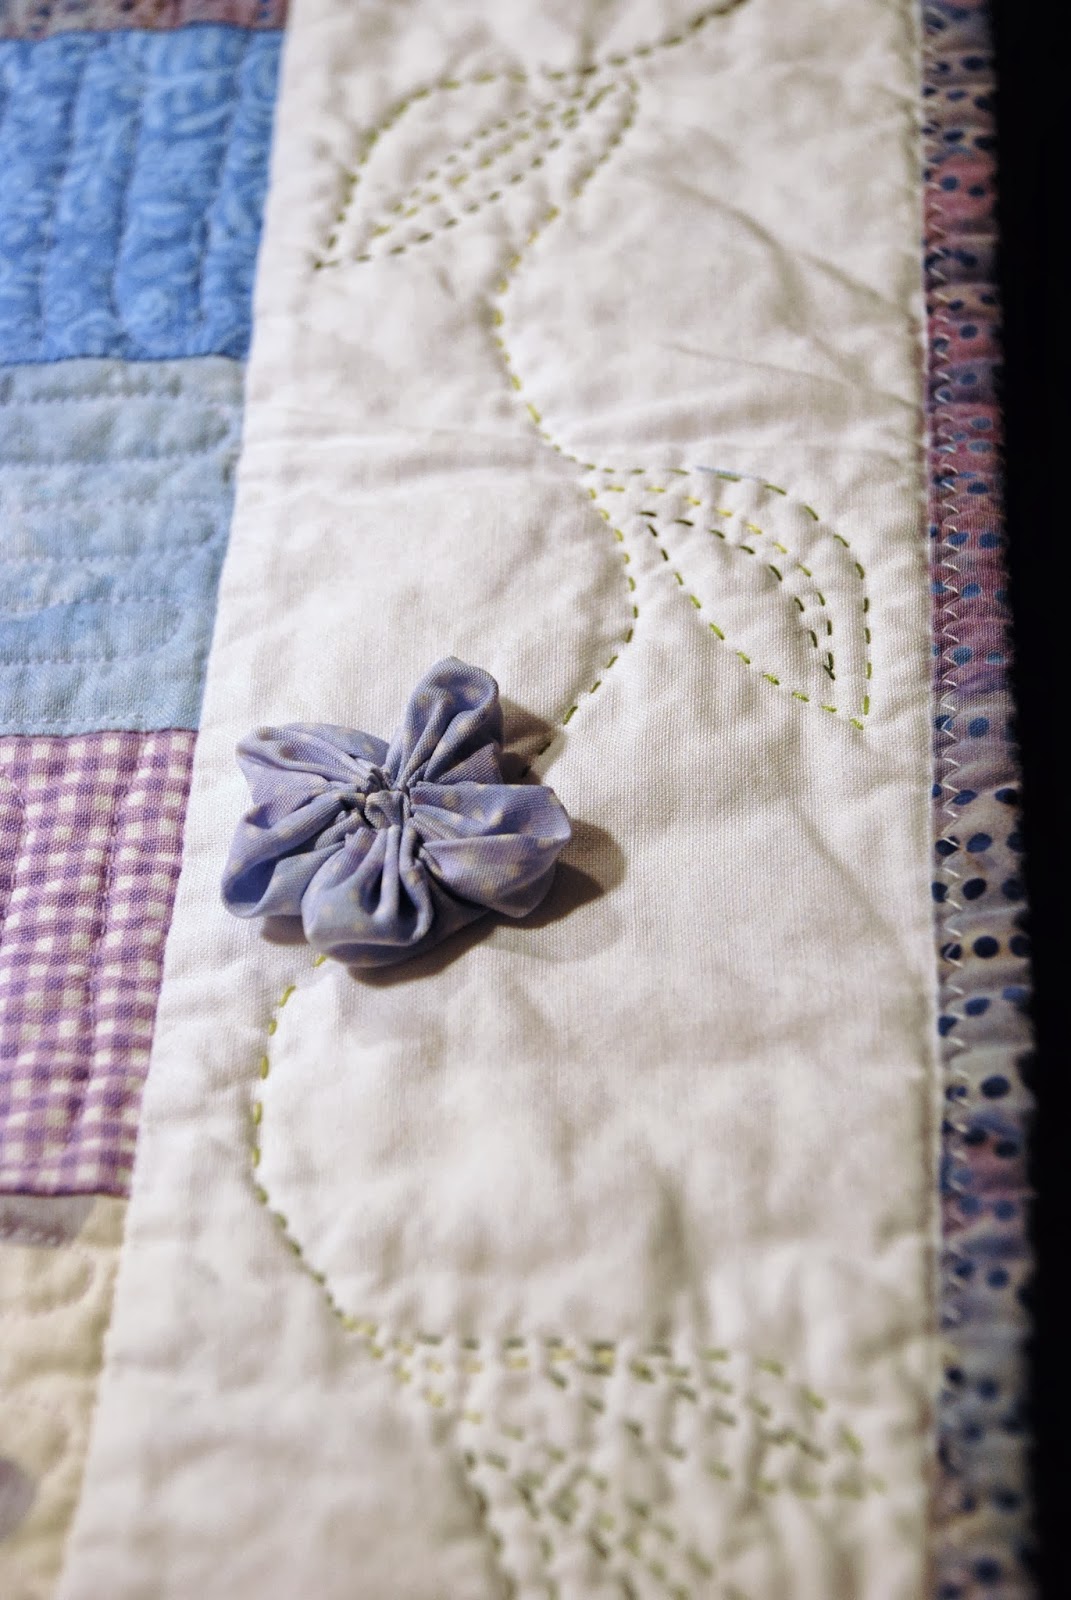
For the border, I used a thread that is variegated green and put my trusty Sashiko machine to work.  It stitches out like hand quilting in a fraction of the time it would take to do this by hand.
Pretty cool, huh?    Don't get me wrong, I love doing my hand quilting, but sometimes when doing free form stitching, it helps to just guide my Sashiko across the fabric and it gives me the freedom to "draw" with the stitches in a more fluid manner than if I was hand stitching for hours and hours.

I had a panel of fabric with sayings about friends and used some of them as the centers of half the flowers.   The remaining fabrics were cut into squares and used as the first border around the flower blocks.   The white outside border created an embellished frame for the whole quilt using the Sashiko stitching and some yo-yo flowers I made up.
I randomly "plopped" the yo-yo flowers around the leaf and vine border, just to give the quilt some added dimension.
Then, I machine quilted around the roses and leaves, and inside the roses to secure the various layers of the flower to the quilt.   The inside border was quilted with simple undulating lines that I rotated from square to square.
Another blurry picture, but at least you can see the quilting and yo-yo flowers a little better here.
 This quilt was a lot of fun for me to make and it was a true labor of love.   And I was able to get it to Barb when her sister-in-law flew up to see her just before her surgery and she tucked the quilt in her luggage. 

 Oh, I almost forgot.   I also made her a matching pillowcase and had the quilt "wrapped" in the pillowcase instead of wrapping paper.    The attached note had instructions for Barb that she couldn't open her present until she got back home from the hospital.   Barb said it was torture for her not to open her gift, but after she was safely back home from her hospital stay, she said she was glad she waited for her surprise.   And I got the most lovely thank you note a few weeks later.  

Giving her a quilt made with love and lots of thoughts of her was not a substitute for being there, but she said it was a close second.
Debbie

Monday, October 8, 2012

Le Fleur

Sewing is fun, but so is scrapbooking, needlepoint and knitting.   Lately, I've been doing a lot of knitting and wait till you see what I played with this weekend.    I took a class at Flying Needles and you'll see the final results in a couple of weeks, but here is a sneak peek at a work in progress.

 I know, I know, it just looks like a blob of yarn right now.  You should see the directions!   Holy cow!  Well, the "blob" will eventually have 6 petals and is going to be a flower.  The black blob in the middle is going to be the center of the flower with stamens and the stem is lime green but hidden by the petals.
There was a lot of increasing and "knit yarn in front and back" in order to get the ruffles.   When the last petal is knitted, the whole thing gets felted in the washing machine with hot water and it shrinks up and the wool stitches get matted together and it shrinks.   When it's dry, the flower can be pinned on a jacket or a purse or whatever you want!    I'm excited to see it completed.  

More pics to come,
Deb

Tuesday, September 25, 2012

Copycat

I honestly don't think I ever come up with a single original idea on my own.   Ok, maybe it happens on occasion.   What I am good at, though, is taking someone else's creation and revamping it and making it my own.   If you follow my other blog, www.threadsofmind.blogspot.com , you probably read how I'm hooked on Pinterest.   Below is the start of my copycat version of pillows I saw on Pinterest.....these are so fun that I think I'll be making a lot of them!  

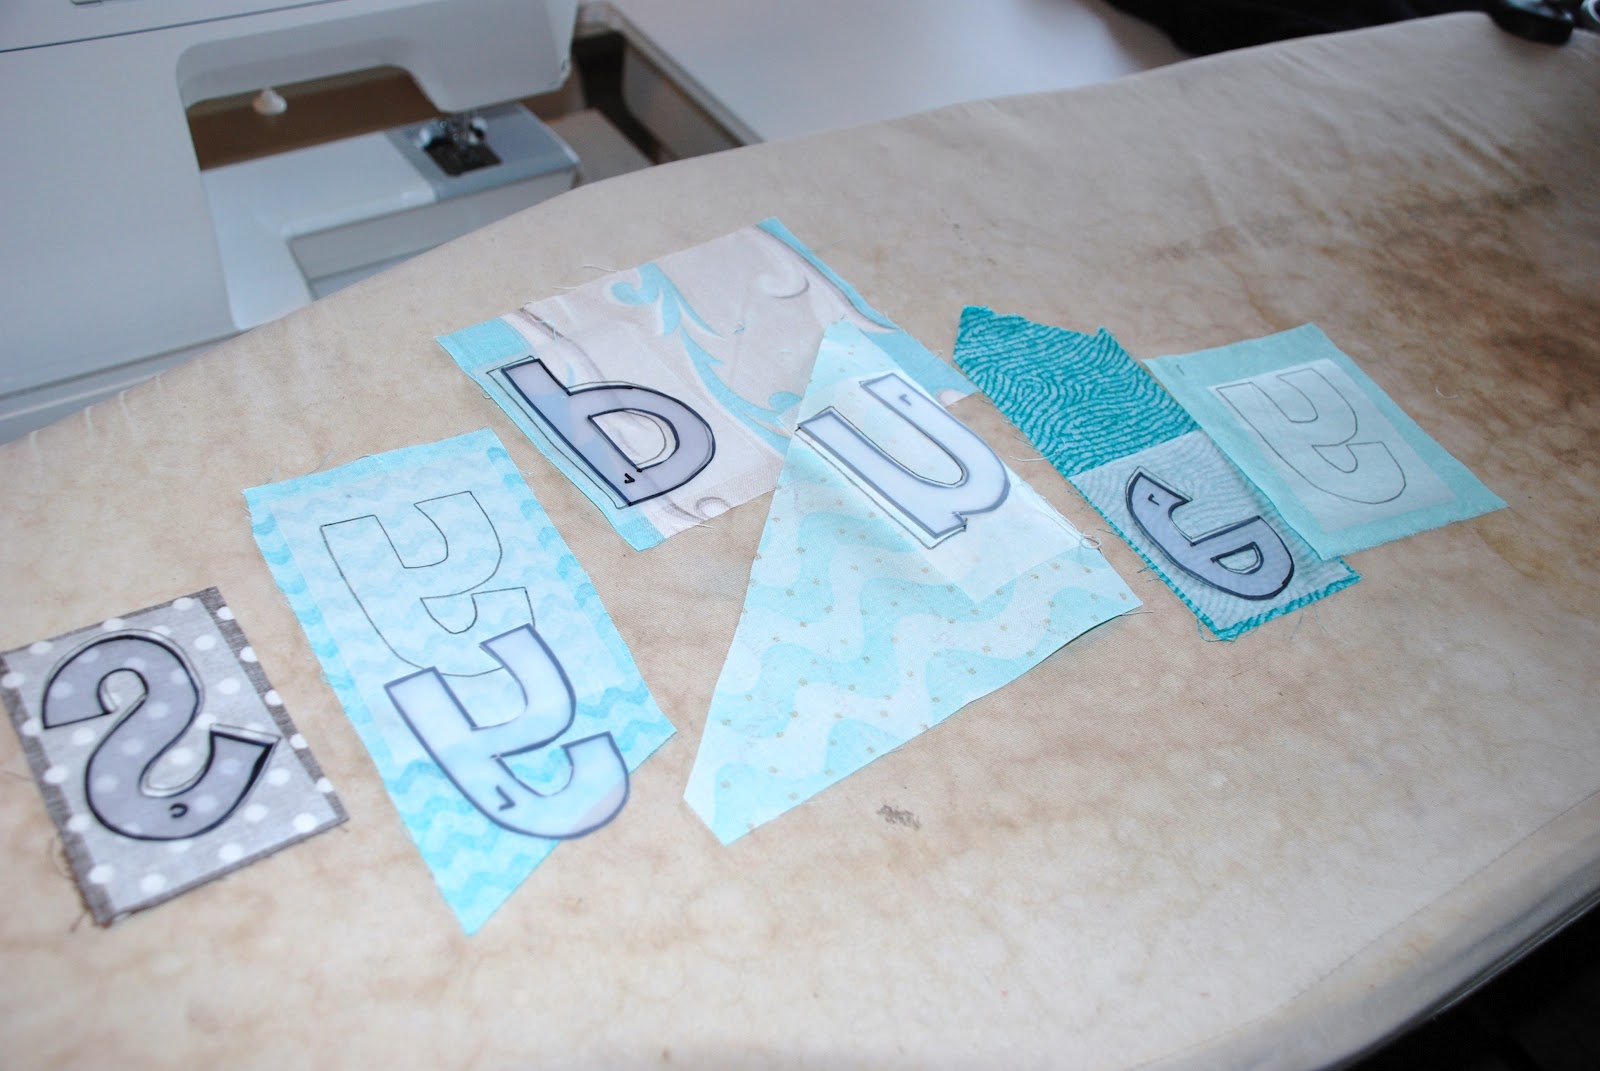
For Jackson's pillow, I cut up some old jeans in my stash to be used for the pillow front.   I added simple letters in various red fabrics and zig-zag stitched them to the jeans.
 A simple lapped closure in two different red fabrics makes it easy to remove the pillow for laundry day.

Sydney's pillow matches her pretty new bedroom, too, only her colors are brown and teal. 
 The letters were traced in reverse on Steam A Seam Lite2, ironed onto the back of the fabrics and cut out on the lines.   They can be placed on the pillow front and repositioned until you like the placement, then simply iron for 5 seconds to hold them in place for stitching.
 For her pillow I straight line stitched instead of zig-zag since the background fabric was kinda busy.
 The back of her pillow is also a simple lapped construction.
And here is the finished product!   Can't wait to make more of these because they are a great way to use "stash" fabrics and the design opportunities are endless.   I'm going to try this same technique on the hem of pillowcases next.

Stitchin' again,
Debbie


Sunday, September 16, 2012

'Tis the Season.......Almost

I know, it seems like summer is still going strong and here I am bringing up Christmas.  But you know that if you are a crafter, and you intend to have completed, handmade presents under the Christmas tree, you had better get started pretty soon!

For myself, I embroidered a funky Florida-style tea towel for my kitchen.   Love the bright tropical colors and the font was fun, too.   Especially the flip flop for the "I" and the palm tree for the "R".  This embroidery was purchased from Embroidery Library online.

These towels were applique and I made them for our kitchen at the river.   They are a little more rustic and fit in there really well.   They are from Art to Heart by Nancy Halvorsen and the book was "Peppermint and Holly Berries".   Really cute designs.   Nancy always does a nice job and I really like her easy to follow instructions.


And then there is the monthly mini-quilt that I made for up at the cabin.   I still have a few more months to complete so I have all 12, but at least now I am ready for Christmas up there!   This is another Nancy Halvorsen book entitled "Count on It".   You may have to "double click" on the pics to see the details like the hand stitching around the appliques.

More projects to come,
Deb

Wednesday, September 12, 2012

Adorable Travel Bag

Have you noticed that the airlines are getting stricter about your carry-on luggage?    Your carry-on has to have the ability to slide under your seat and cannot exceed certain dimensions.    Wouldn't you know, all the bags I wanted to use when I was going on a trip were too big on at least one of the dimensions the airlines posted on their website.  No problem!   Time to make one...

This is Annette's version at the store

Thanks to Annette Fly, who designed this bag at Keep Me In Stitches in Tampa, the solution was an easy one.   Her design is clever, fun, really practical and fit the bill for me.    I used my new monogram software to embroider my initials on the front panel of the bag and added a few extra pockets to the inside. 

                                                             And this is my version
 

 One of the pockets holds my I-Pad, another the power charger.   My camera and purse fit easily inside the bag and another pocket made it easy to have my boarding pass ready for the flight attendant.  I added a tab with a heavy duty snap to hold the bag shut for times I had to place it under the seat. 
                                                    Love all the pockets for organizing
 

And each side has a pocket that holds bottled water
 

This bag is so cute I think I may have to make another!    And I sure have had a lot of compliments on it, too.  Thanks, Annette, for all your tips and tricks that bumped the construction up a couple of notches.   I'm looking forward to designing the next one.

Sew Happy,
Debbie

Tuesday, August 28, 2012

Lobster, Anyone?

Remember the chair I slipcovered with white denim? 


 It had a sea turtle appliqued on the back of the chair and the owner liked it so much that we decided to bring another bit of sea life into the decor.  Here's the lobster pillow I pulled together to put on the brown and cream tweed couch.


I love it when a plan comes together!
Debbie

Monday, August 27, 2012

Wrapping a Present

How do you wrap a present for a fellow quilter?   With fabric, of course!   This summer I sent a package to Barb in Alabama and wrapped it in her favorite colored fabric, lavender.  Well, it's one of her favorite colors.   Here's what it looked like.  


When she unwrapped her gift, instead of throwing away the wrapping paper she had a yard of fabric to add to her stash!   Even the bow and fabric "flower" can be reused.  

 
I wonder how she'll use them..........
Debbie