Wednesday, January 30, 2013

Making Progress

Well, the Monster quilt is coming along nicely.  I worked on it for 2 more days and finally the entire quilt top is completed!  Here are some pics that show how the borders were created.
I cut strips of varying widths from all the fabrics left over that were used to make the circles for the center panel.  Then, they were randomly sewed together and the seams pressed all to one side.   I used the template from the instructions to cut triangles.....lots and lots of triangles, from the newly created strip fabric.
The triangles were evenly spaced along the white borders and pinned in place.   Then I stitched them using a blanket stitch on the sewing machine.

Here's a peek at the quilt top with the borders attached.  Whew!  I need to backtrack here for a minute.   Before attaching the wide borders with the triangles, I had to create the narrow borders.  The green one on the left was no problem.   The orange and red one on the right was easy also and just had to have the large blue ric-rac centered onto the red strip.   The short end borders were another story, though.
The top border was a 2" white strip sewn onto a 1" red strip on one side and a 1" orange strip on the other.  Then I had to cut out and apply 20 1" circles on the white strip.
The bottom border consists of 3-1" blue strips sewn with 2-1" strips in between.   Wow, everything about this quilt takes time!   I have to admit, though, that I have really enjoyed making this quilt.   There's something fun about the challenge of a complex quilt that speaks to me.   Now I just have to "sandwich" the quilt with batting and a fabric I found for the backing with, what else, circles all over it!    Quilting it is another matter.  I have absolutely no idea how I'm going to quilt this one.   Wish I had a long arm quilter......sigh......someday, maybe.

Circle crazy,
Debbie


Tuesday, January 22, 2013

Time to Retire

Just before Christmas, a woman called me and asked if I could have a quilt done by January 4th.  Yikes!   It was Christmas and I had company coming for 10 days.    I told her it would be done and she brought everything over so we could discuss what she wanted the final product to look like.

Here's how everything turned out:
First, here is one of three piles of shirts she brought.
Shirts were first cut and organized into same size piles.
Whew!    Here's the final layout before being sewn together.  36 shirts, jackets and fireman jumpsuits were all incorporated in this quilt.   And, I was also able to add 4 patches and 3 embroideries.
Here is the completed quilt with the fireman border and black binding.   The client cried when she picked up the quilt and she took a pile of my business cards as she left.   The next day after the retirement party, she texted me that her husband was so moved that he cried in front of all his firefighter buddies when she presented the quilt to him........I love what I do for a living!

Very Satisfied,
Debbie

More Monster Quilt

It was months ago when I started to work on a quilt for our youngest grandson.   I got as far as cutting out the monster faces and piecing them together.   But then life got crazy and I had to put the quilt on the back burner.  Well, I have a break from work for clients so I pulled the quilt out again and worked on it last week in earnest.   Here's how far I got....
This quilt has a 39"X60"  center panel that is literally covered with circles.   Tons and tons of circles.   The largest ones I drew out on the back of the fabric and cut out.   But all the circles less than 4" I traced onto Steam A Seam Light II and ironed onto the back of all the fabrics, then cut on the lines to create perfect circles that just needed to be ironed onto the center panel.
I started laying out the medium sized circles after the large monster faces were in place.   Then I filled in with the smaller circles.  Holy cow there were a lot!  I stopped to count them and ended up counting 425!!!  
I thought I would never finish cutting them all out.  
The next job was to iron the ones that had the fusible attached to their back.   That held them in place so I could start the 3 day process of free motion stitching on each and every circle.    Color by color....
Yes, that's a lot of different threads,  isn't it?
Here's a view of the back and the stitching.   After stitching around the larger circles, I cut away the white fabric to eliminate bulk after it's all quilted.

The final step for the inside panel was stitching the mouths of all the monsters.   Now, on to the borders!   Wait'll you see what they're like!   

More to come,
Debbie


Quilts, Quilts, and more Quilts


I know, I know, it's been ages since I posted here.   Fall was kinda crazy around our house.  My mother-in-law fell and had to be hospitalized, our youngest son decided to move to South Dakota, and I had a ton of sewing to do for clients leading up to Christmas.   Other than that, not much was happening!  Ha!

Well, I'm back and here is a look at some recent work.   Thanks for hanging in there with me.....
A wonderfully interesting client approached me about making a few quilts for him utilizing his shirts from the various marathons he has run.   Here are two of them I recently made for him.
This gentleman travels to Pike's Peak in Colorado every year to run this crazy marathon up the mountain and down again.   Whew!    I don't know how he does it...   Here is one of his shirts while I decide what size template to use to trim the shirt to size. 
My templates were cut out of heavy duty plexiglass at Lowe's while I "supervised" the cuts with the poor guy who was on duty that day.   Bet he doesn't want to ever repeat that again!   Ha!
Now that I have an empty bedroom, I put up two 6' folding tables and use them to lay out my quilts.   Here you see the piles of different sized shirts cut and ready for layout.
This part of the process is fun, moving all the shirts around, fitting them together like a jigsaw puzzle.
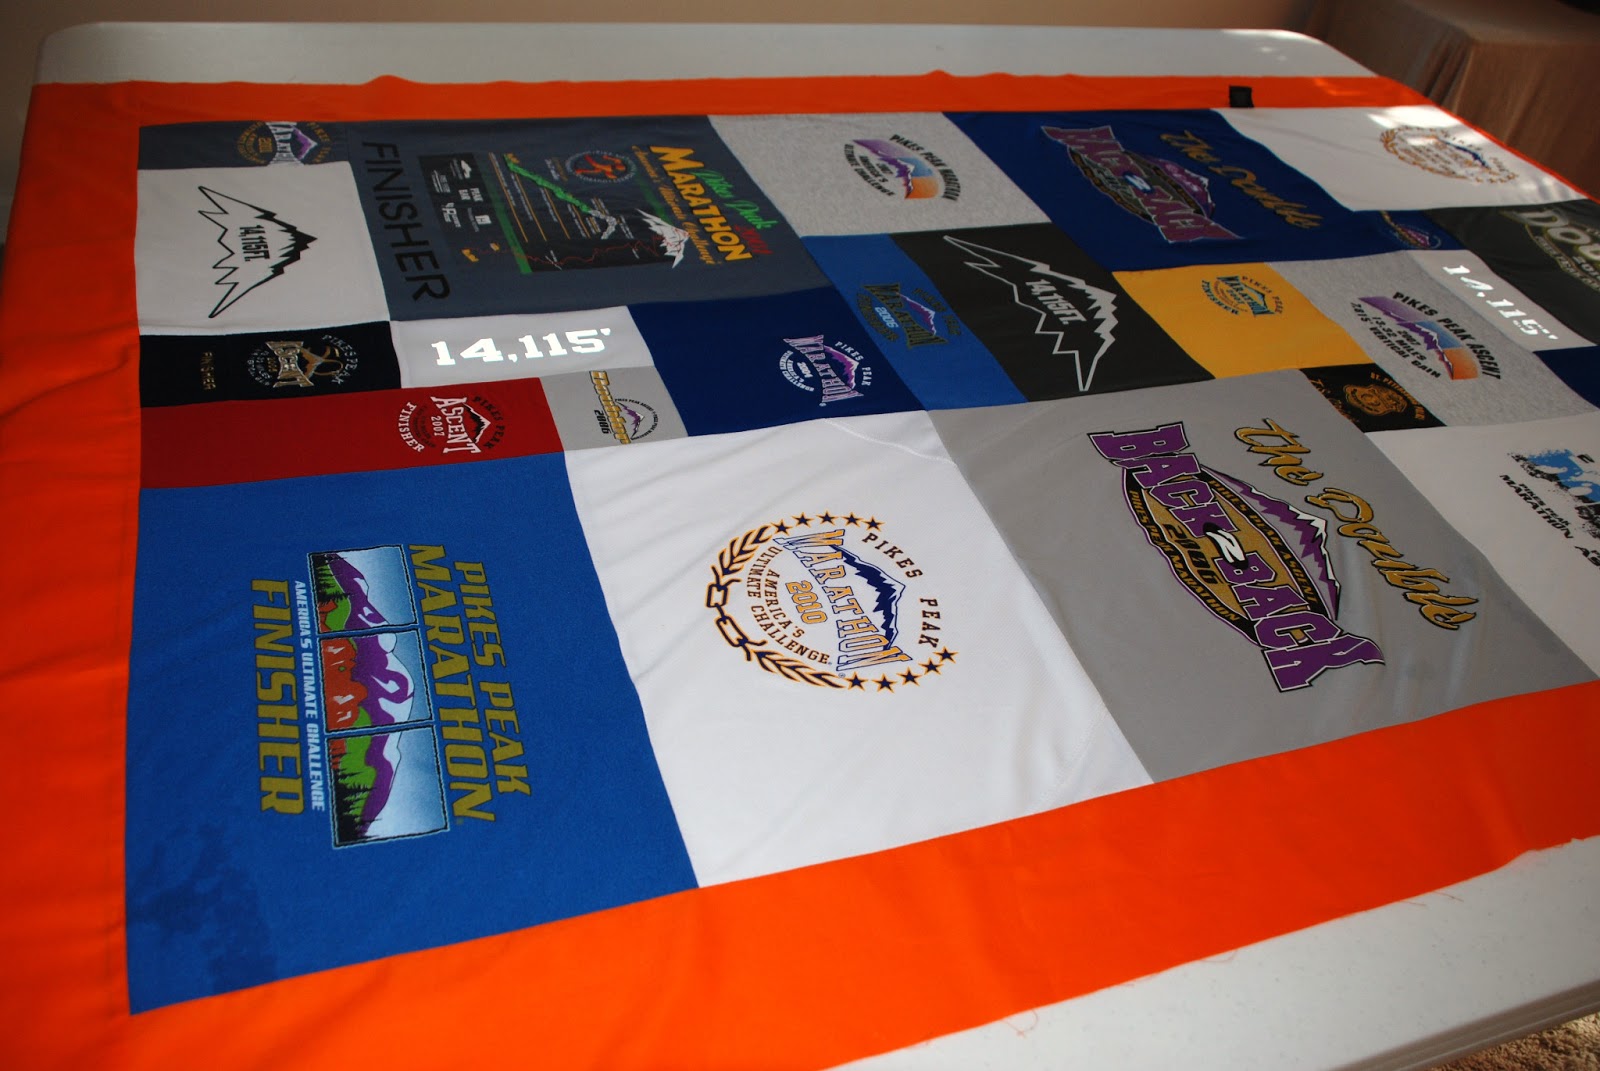
Here they are all sewn together with the orange border added.   Bet you Floridians can guess where the theme of this quilt is going.  Yup!  This guy is a Florida Gator fan.
He brought this flannel to be used as the backing of the quilt.   I added some of the orange to "break" it up a bit and add some interest to the backing.
And here is the completed quilt.   Sorry the pic turned out so dark.   My client was very happy with the end result and was thrilled to see his shirts as a finished product he can enjoy for years to come.  
The same week that I made his Pike's Peak quilt, I also made him one from his Turkey Trot shirts.   This quilt was much simpler and made using 12 shirts all cut the same size and laid out 3 shirts across and 4 shirts down.   Black borders tie it all together.  

He says he has more shirts for me to make into quilts for him in the future.   Bring it on!
Debbie