Saturday, March 14, 2015

Sweater Re-do

 Last week I ran through one of our local thrift shops.   It's not like I was looking for anything specific.....I just needed to get out of the house, if you know what I mean.  So I aimlessly walked up and down the aisles and then I spotted this sweater.
Eureka!   I plunked down my $4.00 and headed out the door.   I knew exactly what I was going to do with this little baby once I got back to my studio.
I cut the sleeves off and laid my hand on the lower portion of one of the sleeves with the ribbing of the sleeve a couple inches below my wrist.     That's how I decided where to make the second cut about 2/3rd the way up the sleeve.
Yup, the sleeve bottoms were perfect to make a pair of Scandinavian-look-alike mittens.  And no tedious knitting involved!   All I did was "trace" the outline of my hand with pins to mark where I needed to serge the knitted fabric so it wouldn't unravel.  

I took the remaining pieces of the upper sleeve and cut the cap off the top so they were large rectangular tubes.   After serging both the top and the bottom of the each tube, I hand sewed the top down in a scant hem so the serging was hidden.   These pieces became boot toppers!   The tops of the sleeves were just the right proportion to slide up over my skinny jeans and fit inside my tall suede boots.
I had Joel take this pic for me.....and I didn't realize the pillow was hiding the top of the boot toppers.  Anyway, I think you get the idea.   And I still have the remaining portion of the sweater which has a handy zipper closure running up the front of it.   I think I'll finish off the armholes from where I cut off the sleeves and then I'll have a vest to wear to make my outfit complete. 

All winter long I've been getting lovely catalogues with enticing pictures of Scandinavian boot toppers.....for sale at a hefty price tag of $38 and higher!   Are you kidding me?    But they were so cute.  Hmmm, maybe I could knit them myself.     Nah, the yarn would cost almost that much.   Now can you see why I was so excited to do this little sweater re-do?
 
Who knew you could have so much fun with $4.00?
Debbie

Friday, March 6, 2015

Out with the Old, In with the New


I have an old iron rack hanging on the wall of our kitchen and that's where I keep a portion of my rather large collection of aprons.   Some I've made over the years, some were gifts from friends and family and some I just had to buy when I spotted them in the store.
I store the majority of the aprons in a closet in the laundry room and switch them out with the seasons.   For February I hung my pink with red lips apron.   What else says Valentine's than rosy lips puckered up, ready for a kiss?
 Now that it's March, I traded out the lips for my St. Patty's Day apron.    I made both aprons a couple of years ago after finding the fabrics at one of my favorite fabric stores in Florida.   So how do you decorate for the seasons?

Debbie

Friday, February 20, 2015

A Quilt for Dawn

Dawn is my daughter-in-law....married to Jarrad.....who is currently going thru chemo for lymphoma.   A couple of weeks ago my quilting friend, Valerie, gave me a panel of sayings that were all cancer related.   I was trying to think of how I could best use the panel, as I loved the sentiments written there, and then it hit me.  

Dawn!   She has been so supportive of Jarrad while he is going thru his cancer treatments.    And I know she loves words of encouragement.   AND, I finally realized I had made several quilts for her boys and Jarrad had several quilts that I have made for him over the years.   But Dawn had none!    Horrors!   giggle......well, that had to be rectified.   Immediately.

I began pulling out fabrics in pinks and lime and all manner of bright colors, playing with them as I went along until I came up with a pleasing cacophony of wild pattern and color combinations. 
This was the "title" of the panel.   I cut strips from the various fabrics in the width of the panel's sayings.     That made it super easy to determine how wide to make them.   Then, as I sewed the sayings into the various fabrics, I staggered them so they would be sprinkled all over the quilt.
See?   It was fun to play with the crazy patterns and colors and begin to sew them together in a pleasing display.
When all the strips were sewn together I added a wide border on 2 sides to make the quilt large enough to lay under and cover up with while watching tv.   I was more concerned with making the quilt long enough as Dawn is almost 6' tall.
Once the quilt top was the width I wanted, I layered it with batting behind it and a colorful backing fabric that matched the wide borders.   To quilt the three layers together, I simply stitched over each seam line with a wavy stitch that is built into my machine.  Can you see the lime thread stitching?
I did this quilt a little different from other quilts I've made as the sayings are "sideways" on this quilt.  They run up and down the long way of the quilt.    I just thought it was more interesting that way.   No one can accuse me of being afraid of mixing color and pattern, that's for sure!   Ha!
On the center back of the quilt I used pink on pink dotted fabric to break up the wild fabric that matched the wide borders on the front.    Then, I embroidered a label for Dawn.   It's hard to read in the pic, but it says,"Feb. 2015      For my faithful and supportive daughter-in-law.   All my love, Debbie"

Cancer doesn't just affect the person with the diagnosis.  It affects every member of their family.  And most especially their spouse and children.  Dawn has been doing a remarkable job taking care of Jarrad all the while she is maintaining her normal routine with the house and two kids.   And she is staying upbeat and supportive.    That's a lot.   And I appreciate how much she loves my son.

This quilt was long overdue.   Now Dawn has something "girly", just for her, in a house filled with testosterone!   ha!  I hope Dawn enjoys snuggling under this quilt as much as I enjoyed making it for her.
Debbie

Saturday, February 7, 2015

Farmer's Wife....Again

Well, this last week I went to a quilt retreat an hour north of our farm.   There were 7 of us stitching away....and then we ate....and stitched some more....and ate again.....and drank cappuccino....and sewed again! 

I had loads of fun and even made a few new friends.   One of the projects I worked on was....whatta ya think?   Yup, THE Farmer's Wife Quilt.

Above is block #36....Flower Garden Path.  I can see that, can't you?   Then I skipped around to block #39.   Umm, yeah, I have decided to make a twin sized quilt instead of the queen.   Now I only need 83 blocks instead of 111.   But I still have a ways to go.   So, back to the blocks.   The one of the right is called Friendship.
And then, #40 on the left is called Friendship Block.  Hmmmm, what makes it different from #39?  Just a little more "jazz" going on the background, I guess.   On the right is #41, Friendship Star.    Are you starting to see a pattern here???
#42 is Fruit Basket and on the right is #44....yes, I skipped a really tough block again.  Don't make fun of me!   #44 is called Gentleman's Fancy. 

So, there you have it.   What you see above represents hours of cutting, piecing and ironing.   Geesh!   Only several dozen more blocks to go.

Working my way thru it,
Debbie

Saturday, January 31, 2015

Back to The Farmer's Wife Quilt

Yes, I know it's been forever since I posted any FW blocks.   To be honest, it's been a while since I made any!   But now I have 3 more to show you.   I think that since the studio is completed I will be getting back into the swing of things and producing more blocks in the near future.

Here's #33, Farmer's Puzzle.   It looks like a puzzle, doesn't it?
 And then #34 is simply named Flock. 
And the last block for today is another Flower Basket....number 35.  
There you have it.   Only 76 more blocks to go.  

Ha!
Deb

Tuesday, January 27, 2015

Jarrad's Quilt

For those of you who know me and my family well, you are already aware that our oldest son, Jarrad was recently diagnosed with lymphoma over Christmas.  While I was in Florida with Jarrad I had my husband mail me an old quilt of Jarrad's that was in desperate need of repair.   I needed something to do with my hands as I sat with Jarrad at different appointments and his first chemo.   But first I need to give you some history behind the quilt.

My first quilting lesson was back in 1987.  We were living north of Kansas City at the time in a little town called Parkville.   Downtown Parkville was very quaint and had a few shops, one of them being a quilt shop.   I was so excited after my first lessons and proceeded to make this twin sized quilt for Jarrad's bed.  

Well, fast forward several years......Jarrad went in the Navy and unbeknownst to me he took the quilt with him.   Trust me when I say that the Navy laundry was not kind to Jarrad's quilt.   I believe it had bleach water thrown on it at least once, if not more often.   And the binding had become nothing more than shreds from the rough laundering.

Fast forward several more years......now Jarrad is married with 2 boys and I spied the quilt folded neatly in a basket on the floor of their living room.  The basket held several quilts I had made for Jarrad over the years and they got plenty of use covering the family while they laid on the couches and watched TV.  

Three years ago I whispered to my daughter-in-law that I was "stealing" the quilt back....with the intention of repairing it and giving it back to Jarrad ready for another 25 years of use.  Well, the quilt got put into a UFO(unfinished objects) bin and then we moved twice.   Fast forward to this Christmas and I remembered the quilt lanquishing in a bin in my new sewing studio.

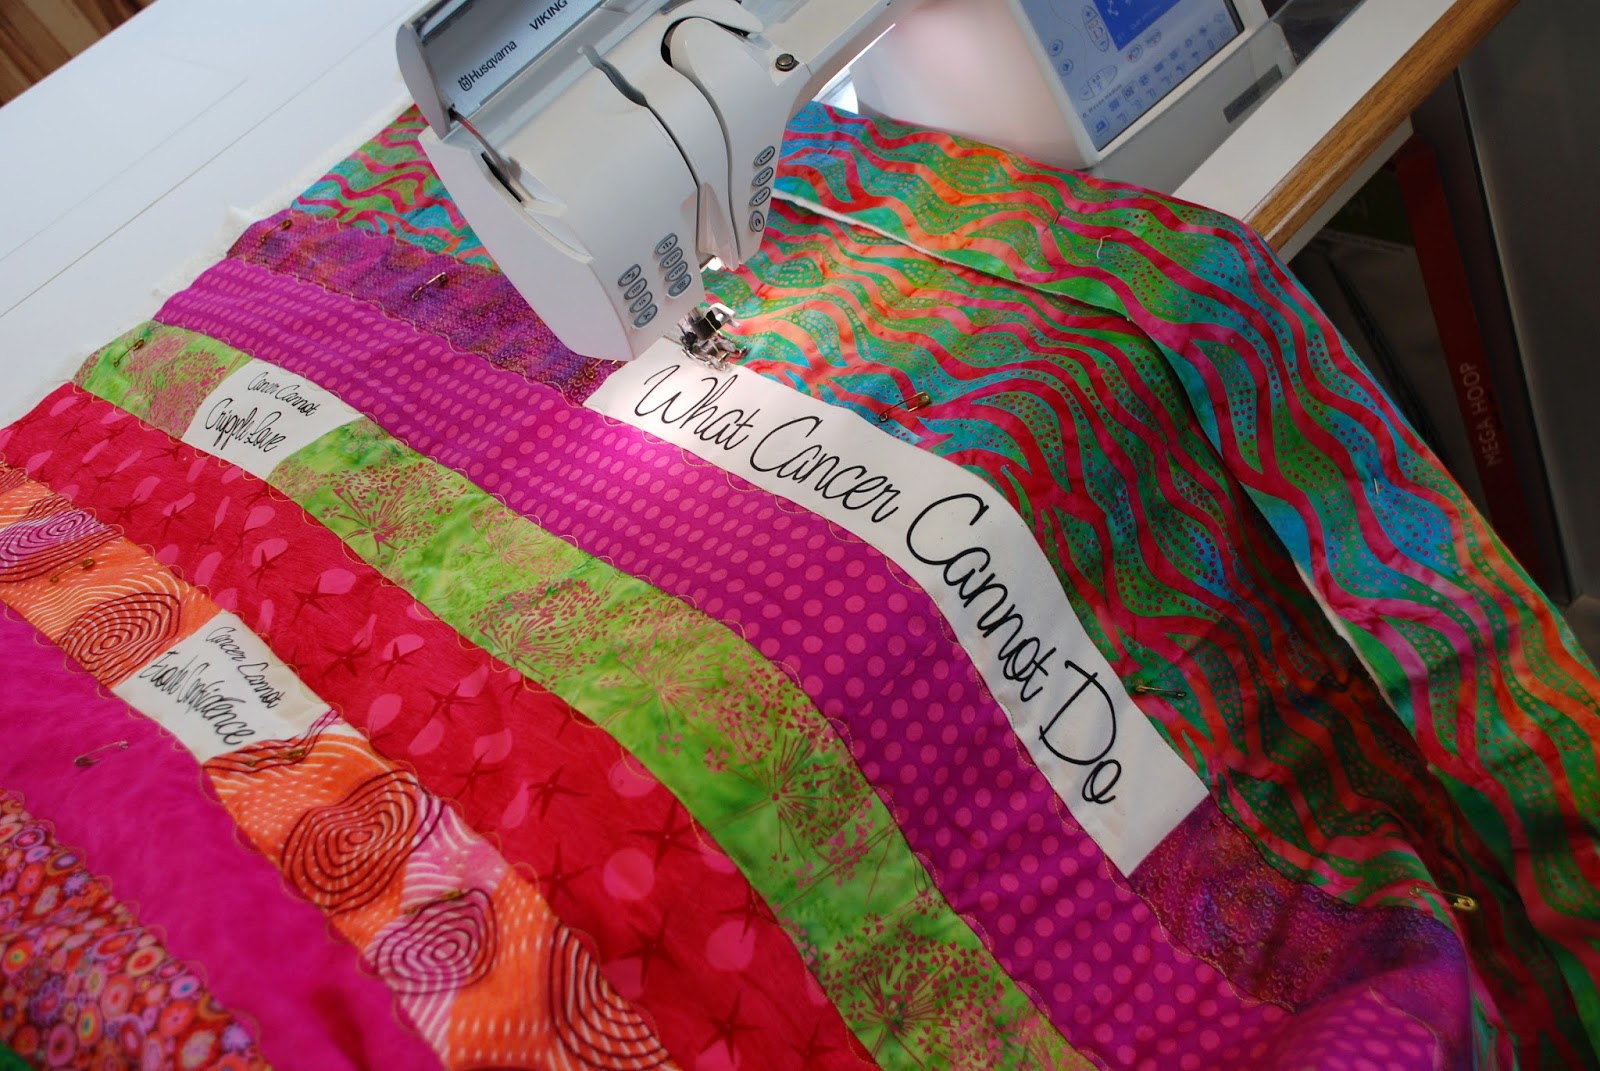
So, Joel sent it to me in Florida where I began making the necessary repairs.  I'm not sure why, but somehow I had thought to save all the leftover pieces of fabric from when I originally made the quilt and they were all together in a plastic bag in one of my bins.   Thank goodness I had them as I used those scraps to make new binding, an applique and a quilt label.
 When I took my first quilting lesson, it was just to learn how to piece the front of the quilt together.   They also taught me how to layer the front of the quilt with batting and then a piece of fabric on the back.    This is called the quilt sandwich.   Well, the sandwich needs something to "hold" it together.   That is usually hand quilting(back then that was the only way to quilt) or you could put embroidery thread "ties" thru the three layers at regular intervals to hold the sandwich together.

I had "tied" his quilt, but the rough handling in the Navy all but destroyed those ties and the three layers were hopelessly flopping around.   I knew it would take me way too long to hand quilt this quilt, so, I decided to do "big Stitch" which is something fairly new in the quilting world.   It is still done by hand, but it goes much faster and is decorative and works well to hold the sandwich together.
This is what the "big Stitch" looks like from the back.  As you can see, the quilt layers are now securely sewn together and the entire quilt will hold up much better to many more years of use.  I altered red, cream and blue threads.......using number 8 Perle Cotton thread which sewed beautifully.
There were some areas of the quilt that had ripped and instead of trying to make the quilt perfect once again, I decided to highlight the age and distressing the quilt had taken on thru the years.   Here I did a simple "X" around an area that had lost the cream and navy fabric.   Who knows how that rip happened?   But I think it adds to the charm and the "story" of Jarrad's quilt.
I do need to backtrack a bit.   At some point during his Navy years, Jarrad brought the quilt home and I attempted to machine quilt waves on the border.   I say attempted because that was before I knew anything about machine quilting.   Now I cringe to look at my first try at what was a new art form at the time.   Trust me when I say my machine quilting has come a long way from that first primitive attempt.   But I am leaving it, as it is also a part of the history of the quilt as well as a history of the progression of my quilting skills.
Here is some more of my early attempts at machine quilting.   Sigh......I was trying to make a center medallion.   Oh, well.
Jarrad has become so involved in renovating VW buses and is in the middle of yet another renovation.   I just had to make an applique of a VW bus in the hopes of putting a smile on his face as he uses this quilt during his chemo sesssions.  
And I finally did what I should have done all those years ago......made a label for the back of the quilt giving it some identity for years in the future.
Here it is.....with all new "ties", red, navy and cream big Stitch, a new sturdier double binding around the quilt, a fun applique for the front and a label on the back.   This was a labor of love and I pray it will bring comfort to Jarrad and that he will be able to feel my love as he lays under this during his recovery.
As I watched Jarrad trying to get comfortable during his first chemo session, I realized he was wishing for a more comfortable pillow.   Ta-da.....I dug out a soft down pillow leftover from my home dec business and made a cover for it complete with the Bible verse I am reciting over and over during Jarrad's battle with cancer.  

The quilt and pillow are going in the mail tomorrow so he will have it to use as he wishes.  I'm so grateful to have sewing as an outlet to show my love and care for our son.  This was a true labor of love that helped me feel like I was doing just a little something to ease Jarrad's suffering.  

So glad I'm a quilter,
Debbie

Sunday, January 18, 2015

Penant Day

While I was in Florida recently I spent some time with our two oldest grandchildren.   One of the things we discussed were their new bedrooms.   Of course, I love to sew something for them to help make each bedroom personalized.   We came up with the idea of making penants for each of their rooms.   And this is what I made once I came back home to my new studio.  
For Jackson, I cut out rectangles from our old atlas using the state of Florida with names of towns and cities Jack would recognize.  Then I stitched brown twine to the tops of the rectangles and attached the cutest little clothespins to the banner.  

I glued his name on individual corrugated cardboard tags and attached each one to the Florida rectangles.   Not too bad, even if I do say so myself.  I hope he likes it!   I wish I had some flag or travel fabric, but, the next best thing for my sports minded grandson is the fabric I found in my stash that covers all things sports.   Now he has another pillowcase from Grammy.....this one will see him through soccer season, baseball season and football season.

Now, on to Sydney.   Her room has teal walls and lime green accents.
I found this fabric while I was in Florida and brought in the orangey-peachy accents.   Her penants are raw edged fabric but in a triangle with heavy white denim heart shapes I spritzed with fabric paint in teal.  Before spraying with the paint I laid her name's letters over the hearts and then removed them to create a negative image of the letter.   Then I used soft teal ric-rac to sew the triangles together.  Done!   Her pillowcase uses the same orangey fabric in the narrow contrast band, soft teal hem and adorable bird fabric in lime and teal for the main part of the pillowcase.

Ok, that's what I sewed this week as a quick project.   Sorry to have been gone for so long......I'll try and post more often again,
Deb