Monday, August 20, 2012

Teal and Monday Morning Musings


I came across these fabrics in my "stash" of material not too long ago.   Teal, in all its shades and hues, is one of my all time favorite colors.   So, I started folding and stacking the luscious pieces and tied them all up with a length of teal ribbon.   They needed to be elevated to bring them more importance so I found a small cake stand and now I think they look so happy together!

Don't your fabrics want to be special, too?
Debbie

Sunday, August 19, 2012

Quilt Trails of Western North Carolina

Now you know how much I love quilts; I love to make them, I love to look at them, I love to sleep under them, I love to find new quilt patterns, and I love to "talk" quilt-shop-talk with other quilters!
It was no surprise that when we were on a recent trip to North Carolina that I brought the car to an immediate stop while driving down a winding country road.   There was a quilt block painted on the side of a barn!!!  

How cool is that?  I knew that someone in a northern state had started a trend of folks painting quilt block patterns on wood and hanging them on the side of their barns.   But, I didn't know that there was a "trail" of quilt barns in North Carolina also.  

I think the blocks look especially pretty against the grey/bleached out wood of the barn siding.

Each day as we left the cabin, I kept a sharp eye out for more of the quilt barns.   As it turns out, there are tour guide brochures you can purchase to guide yourself thru the local farmland and small towns as you hunt down the quilt barns.   Check them out at www.quilttrailswnc.org  


Even the general store in the little neighboring town had a quilt block on it's exterior wall.  See it in yellow near the front of the left side?

I think it would be fun to drive from farm to farm and town to town and see if I could find all the quilt barns.   Hmmmm, I wonder if we could do something like that here in Florida?   Instead of barns, how about the side of buildings....you know, like the murals that some towns paint on buildings to make them prettier?

Just an idea,
Debbie

Friday, August 17, 2012

Sea Turtle

Sometimes I am asked to sew something that I wouldn't ordinarily sew.   That was the case as I helped a friend of ours to paint and update a living room/kitchen of a cute cottage.  I've only made a couple of slipcovers and always say, "Never again!"  because it is a time consuming, often frustrating experience for me.   Well, I got talked into trying again.  Here's what the chair looked like before.....


The fabric is heavy brushed denim in off white.   I washed and dried the fabric first to preshrink it so when the completed slipcover needs to be cleaned, the homeowner can simply pop it in the washer and dryer.

This is the fitting in progress......front shot.....

And here is a side shot......All the pieces get pinned in place to ensure that once sewn, the slipcover fits properly.

I had purchased a piece of home decorator fabric that had beautiful botanically correct drawings of sea creatures.   This sea turtle was the perfect addition to a clean lined simple
(and washable, I might add!)  slipcover for an otherwise ordinary chair.   Now the chair fits in with the Coastal look of the rest of the cottage.  

Whew!    Glad it turned out as pretty as it did........but I think it'll be quite a while before I do another!

Resting up,
Debbie       


Thursday, August 16, 2012

Tyler's Quilt

While I really enjoy making quilts, it's especially fun to make one for someone in the family.   My only nephew graduated from high school up in Pennsylvania in June and I was invited to celebrate at his party.   His mom had sent me some of his high school t-shirts to turn into a quilt and I was determined to get it done before I flew up there.  
Before we started the set up for the party, Tyler opened his quilt.   He loved it!   As a music major, he is involved with all things musical, so the quilt had to have musical elements, too.
Tyler's buddy, Max, thought it was "cool"!  Soccer shirts, music related  and sports shirts from his youth were what made up the quilt.  I really had fun putting them all together and rounding them out with white fabric that had music notes on it.
My brother and his wife sure do know how to put on a great party.   There were over 100 people there.   Thank goodness for the tents which kept the temperature down.
Tyler and his friends had a cool jam session on a stage made from my brother's car hauler.

And the grand finale of the day was a fireworks display put on by my brother, Tim.  Wow!   Thanks for a fun time, guys!

Debbie

Wednesday, August 15, 2012

T-Shirt Quilt Anyone?


Yes, here's another t-shirt quilt hot off the sewing machine. This one was fun to make. Mom had saved his flannel pajama pants and I used those up at the top to form a border.

For me, details make all the difference between something that is just "done" and something that is "done well".   Whenever possible, I try to find parts of a shirt or the clothing I'm using in a quilt to give a three dimensional look to the finished piece.   For this quilt, the Lego brand t-shirt tag was a natural to insert between one of the borders and a quilt block.  Cute, huh?

Stay tuned for more pics,
Debbie

Wednesday, November 2, 2011

Another Take on the Tie Pillow

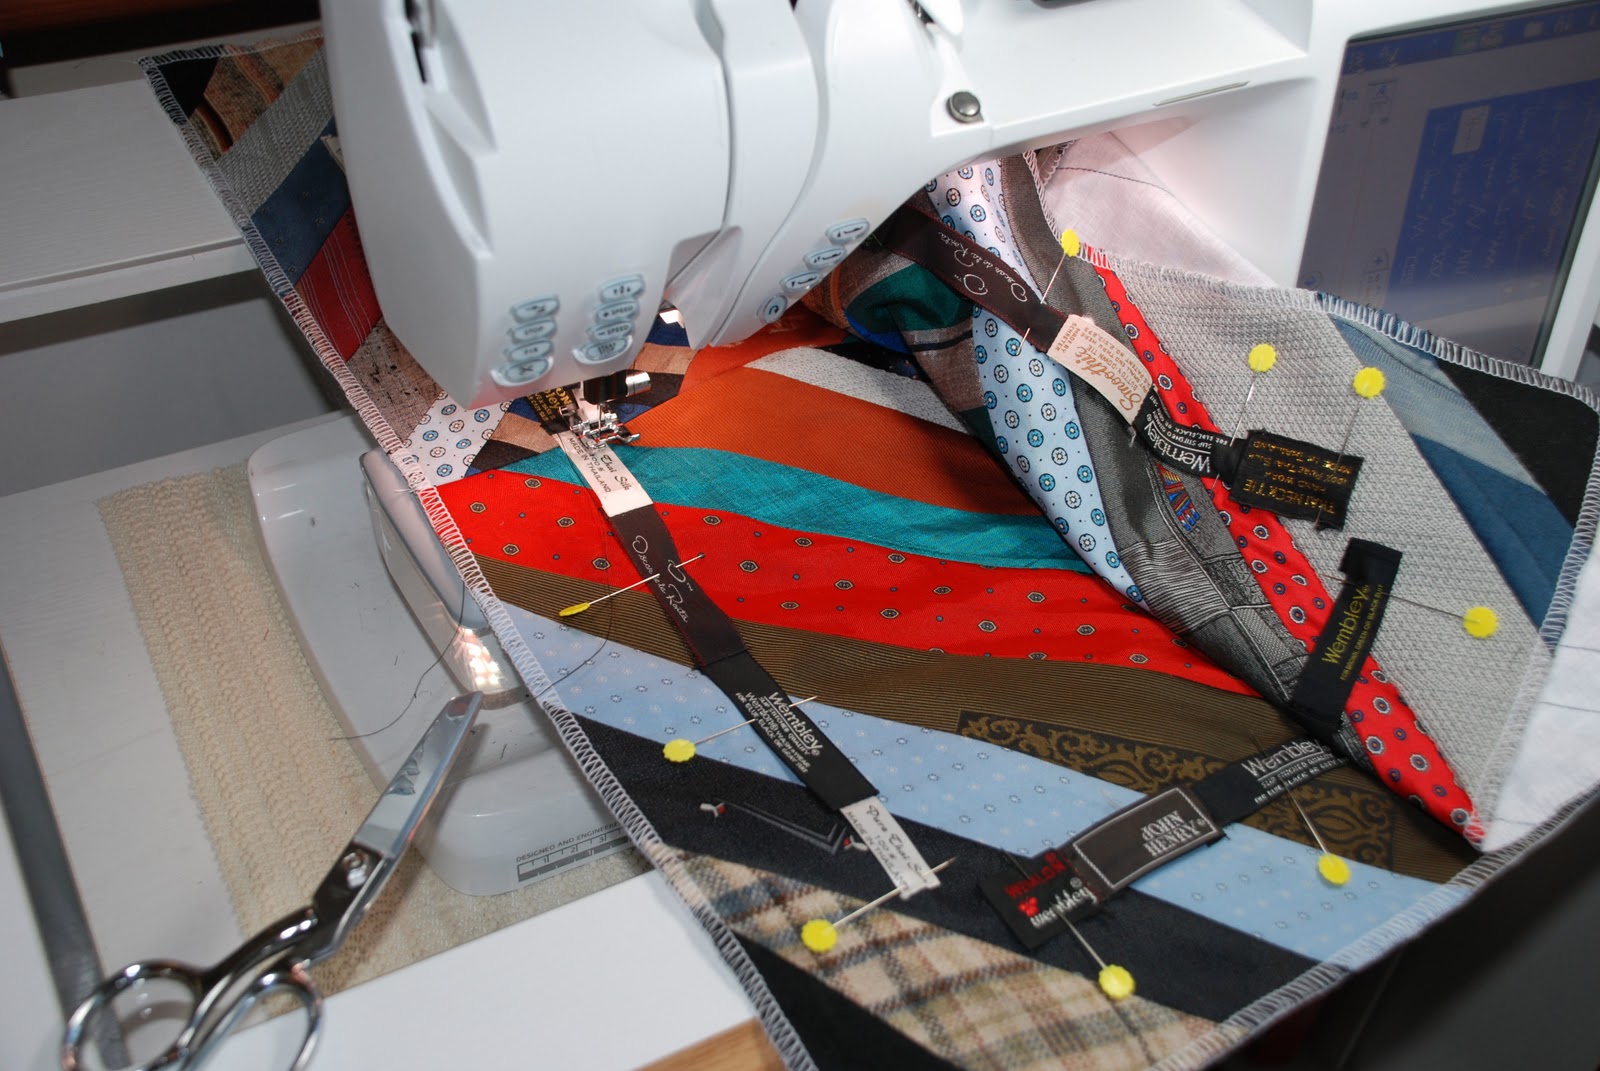
Well, I've been making tie pillows for years now, but recently a client requested something a little different.   Here's what I came up with for her.  
The pillow is comprised of 4 "string" blocks using random widths of ties laid on a 45 degree angle.  When placed together they form a wonky block set "on point".   There were 4 special ties from her dad's travels to the Far East while in the military and those were used in the center as a focal point.
Then I stitched all the tie labels together to form four equal lengths and placed them around the perimeter of the pillow, one strip on each of the four sides.

Simple top stitching holds them all in place and keeps them tidy.   Finally, dark grey and black ties were cut into strips and joined together to cover welting.  Now, on to the back.   It's always an issue of what technique to use to close up a pillow.   Should I invisibly sew a zipper into a side seam, make flaps that overlap and close with a button and buttonhole, or place a zipper 1/3 of the way down from the top inserted into 2 pieces of fabric?  

Since my client wanted to use her dad's sweater on the back, I discovered that by utilizing the ribbed waistband of the sweater, I could eliminate a buttonhole or other form of closure, which would be difficult on such a stretchy knit.  The overlap method worked great and stays in place because of the tension the ribbing causes against the down pillow insert.
Pretty cool, huh?    Especially when you consider this is what I started with..............a pile of ties.....and a sweater.
I love what I do for work!
Just sayin',
Debbie

Sunday, October 9, 2011

Church Ladies

A few months ago I met the quilt group ladies at our church.   Our church is large enough to have a dedicated room just for the sewing girls!   There are machines of all varieties which have been donated by church members over the years and the walls are lined with shelving that has all the cotton fabric folded and neatly separated by color family.  

We make quilts for various charities in the community and there is a never ending list of those in need who would like some of our quilts.   Since we make quilts from whatever fabric is given to us, we must get creative pulling the colors together to make the quilts pleasant.   One day when I first came to group, one of the ladies was commenting about how difficult it was to blend anything with a piece of fabric laying on the table.   Well, I just love a challenge!   After picking thru the shelves for a while, I felt that I had a large enough stack of fabrics that would work with the "offensive" material so I headed for home to play.

Here's what I put together:
All the fabrics were first cut into 2-1/2" & 3" strips of varying lengths.The 2-1/2" strips were sewn randomly together to create one mega-long strip and then I repeated with the 3" strips.   Next, they were all cut into 54" long strips and placed side by side, sometimes inserting a narrower strip in between the wider 3" strips so that there were varying widths and colors.  When I was pleased with the arrangement all the strips were then joined one to another until the quilt top was all together.   Add batting, backing, machine quilt it and put on the binding and you're done.  Pretty easy!  
Give it a try it sometime?
Debbie