There are so many runners who come to me with their prized t-shirts, all of which they acquired after running a marathon. Some even run in the kind of race where you run and bike through a designated course. And then there are those crazy (hey, there's no way I could finish one of these races!) folks who run, bike and swim their way to the finish line. I am always amazed at the wide range of age, ability and motivation of the triathlon participants.
One of our family friends runs in these triathlons....and didn't even start until he was in his late 50's! He recently brought some momentos of his contests and asked me to put them into a quilt. Here is the result.
I took one of the pictures of him running the course and printed it on fabric so it could be included in the quilt next to the shirt from the same race.
Can you read the clock on the picture to the right? Yes, he ran, biked and swam for 9 hours, 21 minutes and 51 seconds. Oh. My. Goodness! How did he do that???
He had removed the front portion of some baseball caps so I serged around them and stitched them down in one of the wide borders.
I was struggling with how to include 2 pieces of memorabilia.....the paper signs that each contestant is required to pin to the front of their shirts. And then it occurred to me that I should mimic the race and I pinned it to the quilt in some open space. It worked out perfectly!
Quilt On,
Debbie
Quirky quilts, custom embroidery, memory quilts and really fun stuff. Contact Debbie @ 1-931-335-9493.
Showing posts with label Quilts for Clients. Show all posts
Wednesday, October 23, 2013
Thursday, October 17, 2013
Baby Time
Recently my friend Bonnie asked if I could knock out a quilt for her soon-to-be-born second grandchild. We discussed a few options and then I remembered cutting out some quilts when I had my shop a couple years ago. I showed her the fabrics and a picture of the finished quilt and we agreed this one would be a winner.
It's just a little baby quilt but the fabrics are what make it sing. Black and white opposed by red and yellow really make this quilt pop. After I had the quilt all put together I decided to quilt it simply by sewing diagonal lines in both directions thru the blocks and all the way to the edge of the quilt. Pretty basic but I think it works and lets the cute fabrics shine.
I decided to finish off the edges with black and white dotted binding and one of my labels.
I hope Bonnie's grandchild gets many years of enjoyment from this colorful quilt.
Sew On,
Debbie
Tuesday, January 22, 2013
Time to Retire
Just before Christmas, a woman called me and asked if I could have a quilt done by January 4th. Yikes! It was Christmas and I had company coming for 10 days. I told her it would be done and she brought everything over so we could discuss what she wanted the final product to look like.
Here's how everything turned out:
First, here is one of three piles of shirts she brought.
Shirts were first cut and organized into same size piles.
Whew! Here's the final layout before being sewn together. 36 shirts, jackets and fireman jumpsuits were all incorporated in this quilt. And, I was also able to add 4 patches and 3 embroideries.
Here is the completed quilt with the fireman border and black binding. The client cried when she picked up the quilt and she took a pile of my business cards as she left. The next day after the retirement party, she texted me that her husband was so moved that he cried in front of all his firefighter buddies when she presented the quilt to him........I love what I do for a living!
Very Satisfied,
Debbie
Here's how everything turned out:
First, here is one of three piles of shirts she brought.
Whew! Here's the final layout before being sewn together. 36 shirts, jackets and fireman jumpsuits were all incorporated in this quilt. And, I was also able to add 4 patches and 3 embroideries.
Here is the completed quilt with the fireman border and black binding. The client cried when she picked up the quilt and she took a pile of my business cards as she left. The next day after the retirement party, she texted me that her husband was so moved that he cried in front of all his firefighter buddies when she presented the quilt to him........I love what I do for a living!
Very Satisfied,
Debbie
Quilts, Quilts, and more Quilts
Well, I'm back and here is a look at some recent work. Thanks for hanging in there with me.....
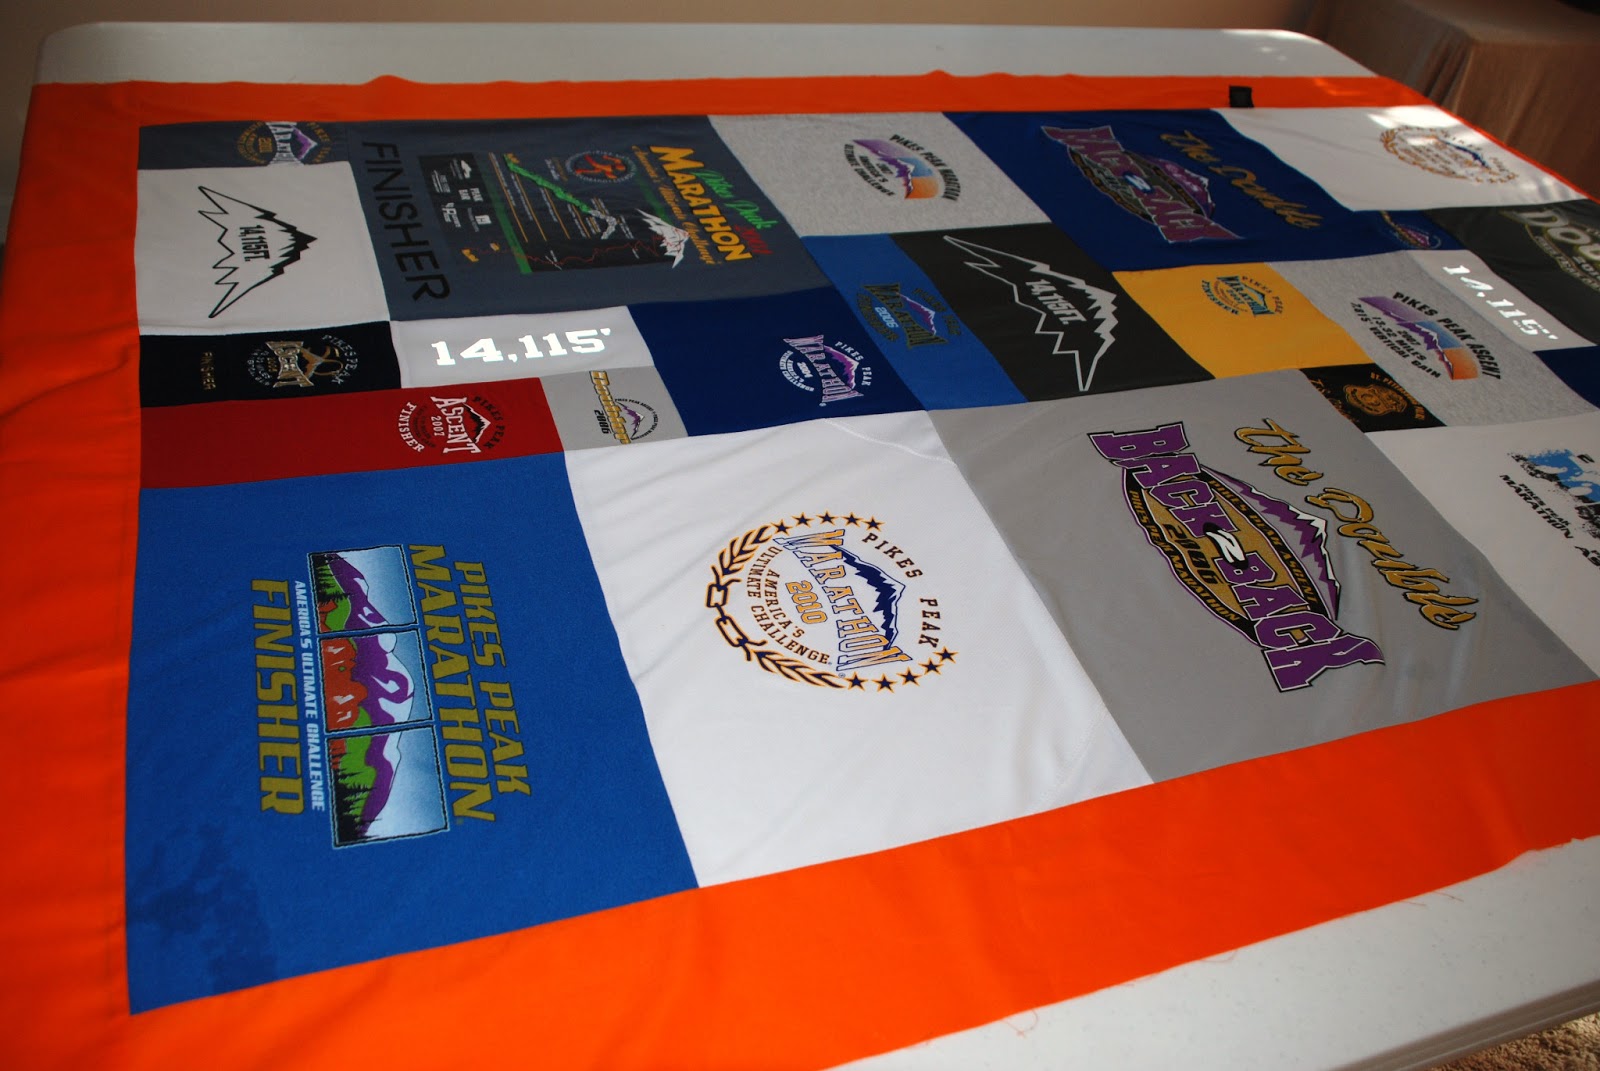
A wonderfully interesting client approached me about making a few quilts for him utilizing his shirts from the various marathons he has run. Here are two of them I recently made for him.
This gentleman travels to Pike's Peak in Colorado every year to run this crazy marathon up the mountain and down again. Whew! I don't know how he does it... Here is one of his shirts while I decide what size template to use to trim the shirt to size.
My templates were cut out of heavy duty plexiglass at Lowe's while I "supervised" the cuts with the poor guy who was on duty that day. Bet he doesn't want to ever repeat that again! Ha!
Now that I have an empty bedroom, I put up two 6' folding tables and use them to lay out my quilts. Here you see the piles of different sized shirts cut and ready for layout.
This part of the process is fun, moving all the shirts around, fitting them together like a jigsaw puzzle.
Here they are all sewn together with the orange border added. Bet you Floridians can guess where the theme of this quilt is going. Yup! This guy is a Florida Gator fan.
He brought this flannel to be used as the backing of the quilt. I added some of the orange to "break" it up a bit and add some interest to the backing.
And here is the completed quilt. Sorry the pic turned out so dark. My client was very happy with the end result and was thrilled to see his shirts as a finished product he can enjoy for years to come.
The same week that I made his Pike's Peak quilt, I also made him one from his Turkey Trot shirts. This quilt was much simpler and made using 12 shirts all cut the same size and laid out 3 shirts across and 4 shirts down. Black borders tie it all together.
He says he has more shirts for me to make into quilts for him in the future. Bring it on!
Debbie
Friday, October 26, 2012
Indian Rocks Christian School Quilt
If you've been reading my other blog you will know why I haven't been doing much sewing this past couple of weeks. But I'm back at it again and this week I took 50 hand painted blocks from the fourth grade class of Indian Rocks Christian School and pieced together a quilt for them. Each year the fourth grade art class does this project and this is the second year I have turned their blocks into a quilt. Last year's quilt won a blue ribbon at the Florida State Fair!
Each year the quilt is auctioned off at the Fall school fund raiser and the buyer is usually a parent of one of the children that helped paint the blocks. I hope this year the quilt helps to raise a lot of funds for the school. Last year I arranged the blocks so it was more of an art quilt, but this year I choose to arrange them symmetrically with the four large blocks in the corners, the map of the U.S. in the center and the state flag blocks filling in between them.
I'd also like to say a big thanks to Robin, the art teacher who organizes all of this and who so graciously works with me on this project. She does all the leg work and makes my job a lot easier because then I can concentrate on just doing the sewing.
Every quilt needs a label as the finishing touch and to help document a little history of the quilt. I couldn't believe I had this fabric with a dark navy field and small white stars in my stash. It was the perfect material to frame the label and I also used it as the binding around the quilt.
Ta-da! Done!
Debbie
Each year the quilt is auctioned off at the Fall school fund raiser and the buyer is usually a parent of one of the children that helped paint the blocks. I hope this year the quilt helps to raise a lot of funds for the school. Last year I arranged the blocks so it was more of an art quilt, but this year I choose to arrange them symmetrically with the four large blocks in the corners, the map of the U.S. in the center and the state flag blocks filling in between them.
I'd also like to say a big thanks to Robin, the art teacher who organizes all of this and who so graciously works with me on this project. She does all the leg work and makes my job a lot easier because then I can concentrate on just doing the sewing.
Every quilt needs a label as the finishing touch and to help document a little history of the quilt. I couldn't believe I had this fabric with a dark navy field and small white stars in my stash. It was the perfect material to frame the label and I also used it as the binding around the quilt.
Ta-da! Done!
Debbie
Monday, September 10, 2012
Grandma's Flower Basket
How many of you have quilt "tops" tucked away somewhere in a closet, drawer or trunk? You know, a family member cut and pieced together hundreds of pieces of fabric into a design and created the beginnings of a quilt. Then, the family member died or the top just got lost in the shuffle of everyday life and never got turned into a completed quilt.
Well that happened to a family friend of ours. When I was approached about completing the quilt I was a little hesitant because I wanted to be sure to finish the quilt the way the quilter would have wanted it quilted. When the quilt came to me it had been pinned for years with pins that had deteriorated and rusted and left rust stains on the quilt itself. I was dismayed.
I really like how the stitching looks on the plain white backing of the quilt.
The parallel lines of stitching look really cool along the four sides of the quilt where I stitched the "on point" squares into the four borders.
The quilt got a good long 2 day soak which removed most of the rust and stains and brightened up the white fabric that had yellowed a bit in storage. Even though a few spots remained, the owner of the quilt was so thrilled to receive a completed quilt back into her arms.
I must say, I felt pretty good about how it turned out and was so happy to finish what was started a long time ago by a kindred spirit, another quilter.
Keep on Stitchin',
Debbie
Well that happened to a family friend of ours. When I was approached about completing the quilt I was a little hesitant because I wanted to be sure to finish the quilt the way the quilter would have wanted it quilted. When the quilt came to me it had been pinned for years with pins that had deteriorated and rusted and left rust stains on the quilt itself. I was dismayed.
The first thing I did was to remove all the pins and check to see if any repairs had to be made. Since the quilt already had the batting and a backing in place, I could move on to designing a quilt stitch pattern in keeping with the era of the blocks on the quilt.
I decided that all the lavender and white checkerboard blocks would be stitched with simple parallel lines of stitching and the basket blocks would be outline stitched.
I really like how the stitching looks on the plain white backing of the quilt.
The parallel lines of stitching look really cool along the four sides of the quilt where I stitched the "on point" squares into the four borders.
The quilt got a good long 2 day soak which removed most of the rust and stains and brightened up the white fabric that had yellowed a bit in storage. Even though a few spots remained, the owner of the quilt was so thrilled to receive a completed quilt back into her arms.
I must say, I felt pretty good about how it turned out and was so happy to finish what was started a long time ago by a kindred spirit, another quilter.
Keep on Stitchin',
Debbie
Sunday, August 26, 2012
Blue Ribbon Winner
Last September I was approached by one of the ladies in our church asking me if I would be willing to make a quilt for the elementary school there. A couple of weeks later I had a stack of squares that the fourth grade class had painted. Each square was painted with a state flag. The art teacher had painted several large pieces, each depicting landmarks of our country. The trick for me was to assemble all these pieces into a quilt that would look interesting and a little different.
My goal was to arrange the largest pieces at strategic points in the quilt so your eye would travel around and take in the quilt as a whole. Then, fill in with the flag blocks.
In previous years, the flag blocks all had sashing around them and were arranged symmetrically. Not this year! I had something else in mind.
Normally the label is placed on the back of the quilt, but since this was going to be hung on a wall I felt the label should be on the front so anyone viewing it could read about the history of the quilt.
Now that the label was on and the blocks all assembled, all that was left for me to do was to quilt it!
The quilt was a bit of a rush job as the kids had just finished painting the squares two weeks before the school was holding an auction. The quilt was to auctioned off that night to raise money for the school. One lucky family bought the quilt and took it home with them. I thought that was the last I would see of it. Boy, was I wrong!
A few months later Joel and I were at the Florida State Fair. We strolled through the building that housed the quilt show and then we had a real shocker. The quilt from the school was in a showcase and it had a blue ribbon on it! I can't remember when I was so excited.......I've never entered a quilt in a quilt show and couldn't believe what I was seeing. Apparently, the new owners of the quilt had entered it on behalf of the students at the school.
Amazing! That was most definitely the most exciting trip to the Florida State Fair I've ever had!
Kudos to the students and the art teacher who all did such a great job painting the squares. It made my job a lot of fun and I was proud to help them complete their project.
Blue is my new favorite color,
Debbie
Wednesday, August 15, 2012
T-Shirt Quilt Anyone?
Yes, here's another t-shirt quilt hot off the sewing machine. This one was fun to make. Mom had saved his flannel pajama pants and I used those up at the top to form a border.
Stay tuned for more pics,
Debbie
Subscribe to:
Posts (Atom)