While I really enjoy making quilts, it's especially fun to make one for someone in the family. My only nephew graduated from high school up in Pennsylvania in June and I was invited to celebrate at his party. His mom had sent me some of his high school t-shirts to turn into a quilt and I was determined to get it done before I flew up there.
Before we started the set up for the party, Tyler opened his quilt. He loved it! As a music major, he is involved with all things musical, so the quilt had to have musical elements, too.
Tyler's buddy, Max, thought it was "cool"! Soccer shirts, music related and sports shirts from his youth were what made up the quilt. I really had fun putting them all together and rounding them out with white fabric that had music notes on it.
My brother and his wife sure do know how to put on a great party. There were over 100 people there. Thank goodness for the tents which kept the temperature down.
Tyler and his friends had a cool jam session on a stage made from my brother's car hauler.
And the grand finale of the day was a fireworks display put on by my brother, Tim. Wow! Thanks for a fun time, guys!
Debbie
Quirky quilts, custom embroidery, memory quilts and really fun stuff. Contact Debbie @ 1-931-335-9493.
Thursday, August 16, 2012
Wednesday, August 15, 2012
T-Shirt Quilt Anyone?
Yes, here's another t-shirt quilt hot off the sewing machine. This one was fun to make. Mom had saved his flannel pajama pants and I used those up at the top to form a border.
Stay tuned for more pics,
Debbie
Wednesday, November 2, 2011
Another Take on the Tie Pillow
Well, I've been making tie pillows for years now, but recently a client requested something a little different. Here's what I came up with for her.
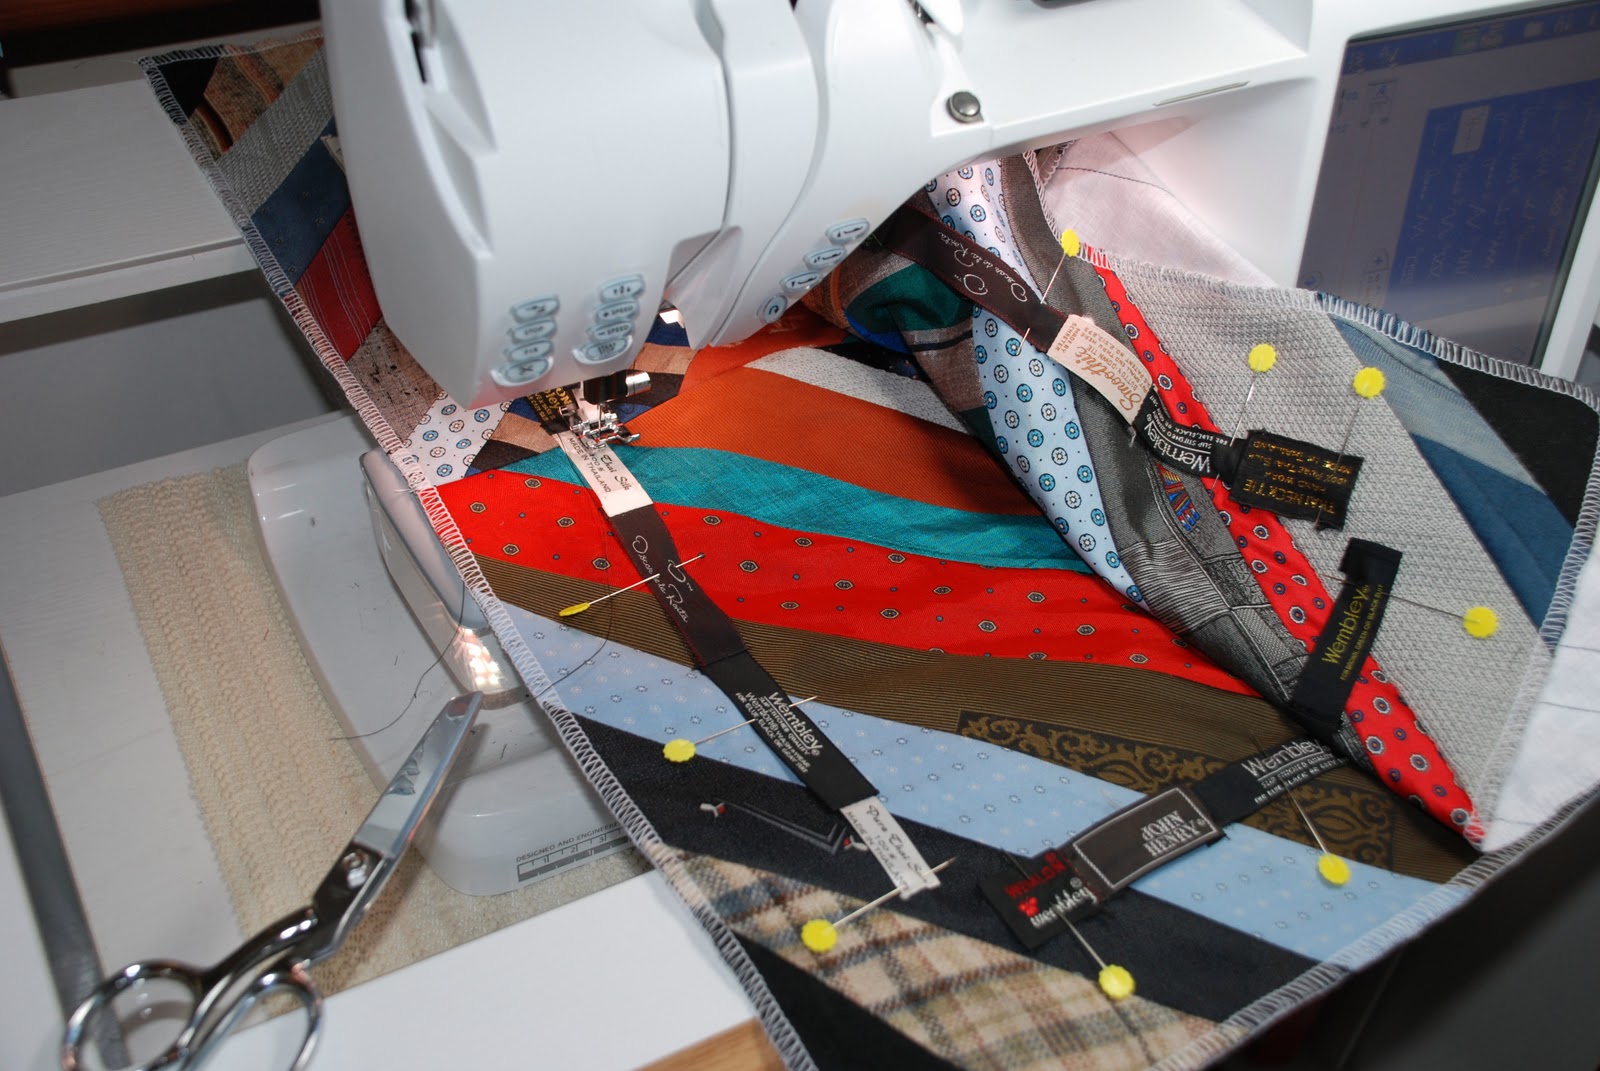
The pillow is comprised of 4 "string" blocks using random widths of ties laid on a 45 degree angle. When placed together they form a wonky block set "on point". There were 4 special ties from her dad's travels to the Far East while in the military and those were used in the center as a focal point.
Then I stitched all the tie labels together to form four equal lengths and placed them around the perimeter of the pillow, one strip on each of the four sides.
Simple top stitching holds them all in place and keeps them tidy. Finally, dark grey and black ties were cut into strips and joined together to cover welting. Now, on to the back. It's always an issue of what technique to use to close up a pillow. Should I invisibly sew a zipper into a side seam, make flaps that overlap and close with a button and buttonhole, or place a zipper 1/3 of the way down from the top inserted into 2 pieces of fabric?
Since my client wanted to use her dad's sweater on the back, I discovered that by utilizing the ribbed waistband of the sweater, I could eliminate a buttonhole or other form of closure, which would be difficult on such a stretchy knit. The overlap method worked great and stays in place because of the tension the ribbing causes against the down pillow insert.
Pretty cool, huh? Especially when you consider this is what I started with..............a pile of ties.....and a sweater.
I love what I do for work!
Just sayin',
Debbie
The pillow is comprised of 4 "string" blocks using random widths of ties laid on a 45 degree angle. When placed together they form a wonky block set "on point". There were 4 special ties from her dad's travels to the Far East while in the military and those were used in the center as a focal point.
Then I stitched all the tie labels together to form four equal lengths and placed them around the perimeter of the pillow, one strip on each of the four sides.
Simple top stitching holds them all in place and keeps them tidy. Finally, dark grey and black ties were cut into strips and joined together to cover welting. Now, on to the back. It's always an issue of what technique to use to close up a pillow. Should I invisibly sew a zipper into a side seam, make flaps that overlap and close with a button and buttonhole, or place a zipper 1/3 of the way down from the top inserted into 2 pieces of fabric?
Since my client wanted to use her dad's sweater on the back, I discovered that by utilizing the ribbed waistband of the sweater, I could eliminate a buttonhole or other form of closure, which would be difficult on such a stretchy knit. The overlap method worked great and stays in place because of the tension the ribbing causes against the down pillow insert.
Pretty cool, huh? Especially when you consider this is what I started with..............a pile of ties.....and a sweater.
I love what I do for work!
Just sayin',
Debbie
Sunday, October 9, 2011
Church Ladies
A few months ago I met the quilt group ladies at our church. Our church is large enough to have a dedicated room just for the sewing girls! There are machines of all varieties which have been donated by church members over the years and the walls are lined with shelving that has all the cotton fabric folded and neatly separated by color family.
We make quilts for various charities in the community and there is a never ending list of those in need who would like some of our quilts. Since we make quilts from whatever fabric is given to us, we must get creative pulling the colors together to make the quilts pleasant. One day when I first came to group, one of the ladies was commenting about how difficult it was to blend anything with a piece of fabric laying on the table. Well, I just love a challenge! After picking thru the shelves for a while, I felt that I had a large enough stack of fabrics that would work with the "offensive" material so I headed for home to play.
Here's what I put together:
All the fabrics were first cut into 2-1/2" & 3" strips of varying lengths.The 2-1/2" strips were sewn randomly together to create one mega-long strip and then I repeated with the 3" strips. Next, they were all cut into 54" long strips and placed side by side, sometimes inserting a narrower strip in between the wider 3" strips so that there were varying widths and colors. When I was pleased with the arrangement all the strips were then joined one to another until the quilt top was all together. Add batting, backing, machine quilt it and put on the binding and you're done. Pretty easy!
Give it a try it sometime?
Debbie
We make quilts for various charities in the community and there is a never ending list of those in need who would like some of our quilts. Since we make quilts from whatever fabric is given to us, we must get creative pulling the colors together to make the quilts pleasant. One day when I first came to group, one of the ladies was commenting about how difficult it was to blend anything with a piece of fabric laying on the table. Well, I just love a challenge! After picking thru the shelves for a while, I felt that I had a large enough stack of fabrics that would work with the "offensive" material so I headed for home to play.
Here's what I put together:
All the fabrics were first cut into 2-1/2" & 3" strips of varying lengths.The 2-1/2" strips were sewn randomly together to create one mega-long strip and then I repeated with the 3" strips. Next, they were all cut into 54" long strips and placed side by side, sometimes inserting a narrower strip in between the wider 3" strips so that there were varying widths and colors. When I was pleased with the arrangement all the strips were then joined one to another until the quilt top was all together. Add batting, backing, machine quilt it and put on the binding and you're done. Pretty easy!
Give it a try it sometime?
Debbie
Tuesday, June 21, 2011
Finished Product
Yes, I know, I keep forgetting to put the "after" pics on the blog. So, here is the pic of the basket I made when Susan Marie was up at the river with me. I was pretty excited about how it turned out. Pretty cool making something functional out of things found in the woods. Making this basket gave me a new appreciation for how much time and effort goes into making baskets with a really tight weave, since this one took me two days labor. Susan helped me so much or I wouldn't have finished it by myself.
Fumble Thumbs,
Debbie
Fumble Thumbs,
Debbie
Wednesday, May 25, 2011
Flippie Time
A friend of ours up at the river did me a favor and painted some lettering on a sign and we decided to barter our talents. In exchange for her painting I embroidered some flip flops on a pair of her shorts and matching jacket. This is what they look like. It was a fun project for me and I hope she likes them.
I put small flips on the left side of her lapel and a clothesline of flips on each jacket cuff.
And to tie it all together, the shorts now have flips on each leg at the side vent.
As I was embroidering the cuffs, I realized that because of the curve of the design, it would lend itself to being sewn on a visor. Hmmmmm......maybe next time. If you'd like to see the designs up close just "double click" with your mouse.
Flipping "Out",
Debbie
I put small flips on the left side of her lapel and a clothesline of flips on each jacket cuff.
And to tie it all together, the shorts now have flips on each leg at the side vent.
As I was embroidering the cuffs, I realized that because of the curve of the design, it would lend itself to being sewn on a visor. Hmmmmm......maybe next time. If you'd like to see the designs up close just "double click" with your mouse.
Flipping "Out",
Debbie
Tuesday, May 17, 2011
Ostrich, anyone?
I know, it's been a while since I've posted.....we always seem to have something going on here at our house. My husband had a close medical scare and that has thrown our lives into a different (healthier? tee-hee) direction. Maybe now we can get our lives back to normal, whatever that is.
Recently, our oldest son, Jarrad, bought a '78 Volkswagon van and is in the middle of restoring it. The engine/mechanical work is pretty much finished, and now he gets to play with the cosmetic work. That's where I came in......well, that's where I got dragged in....you could say. He asked if I could help him reupholster the car seats. Ummmmm......I guess so.....ummmm, never did that before but we can try.
Off we go to Joann's Fabrics where he had seen this...
Yup, fake ostrich. Pretty convincing, too! So he picked out a companion fabric and we estimated our yardage, had it cut and drove home. Yikes! Now I have to DO something with this fabric. Ok, breathe.
He had already torn apart the seat covers so I could use them as a pattern. Man, were they ever disgustingly filthy dirty. I had grit all over my kitchen and dining room, but they worked pretty well as a pattern for the new covers.
With just a little trial and error the new covers came together fairly easily.....surprisingly......amazingly....guess that wasn't so bad after all.... And, of course, thank goodness that Jarrad can take anything apart and put it back together again like he was simply making a piece of toast. He man-handled the metal attachments for the seats and before I knew it, they were transformed into something pretty darned nice!
Pretty danged fancy, if you ask me.....just another weekend at the Roberts' house. Oh, well, Jarrad is really "stoked" as he likes to say. As every mom knows, when your kids are happy, mama is happy, right?
The End,
Mama
Recently, our oldest son, Jarrad, bought a '78 Volkswagon van and is in the middle of restoring it. The engine/mechanical work is pretty much finished, and now he gets to play with the cosmetic work. That's where I came in......well, that's where I got dragged in....you could say. He asked if I could help him reupholster the car seats. Ummmmm......I guess so.....ummmm, never did that before but we can try.
Off we go to Joann's Fabrics where he had seen this...
He had already torn apart the seat covers so I could use them as a pattern. Man, were they ever disgustingly filthy dirty. I had grit all over my kitchen and dining room, but they worked pretty well as a pattern for the new covers.
With just a little trial and error the new covers came together fairly easily.....surprisingly......amazingly....guess that wasn't so bad after all.... And, of course, thank goodness that Jarrad can take anything apart and put it back together again like he was simply making a piece of toast. He man-handled the metal attachments for the seats and before I knew it, they were transformed into something pretty darned nice!
And here are the front seats installed. Not too shabby, even if I do say so myself. Now, if he could just put in some door side panels. Giggle....
The kids even like riding back here.....they seem to have already claimed their space in the van.Pretty danged fancy, if you ask me.....just another weekend at the Roberts' house. Oh, well, Jarrad is really "stoked" as he likes to say. As every mom knows, when your kids are happy, mama is happy, right?
The End,
Mama
Subscribe to:
Posts (Atom)